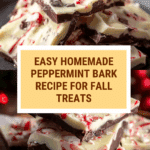
Peppermint Bark Recipe
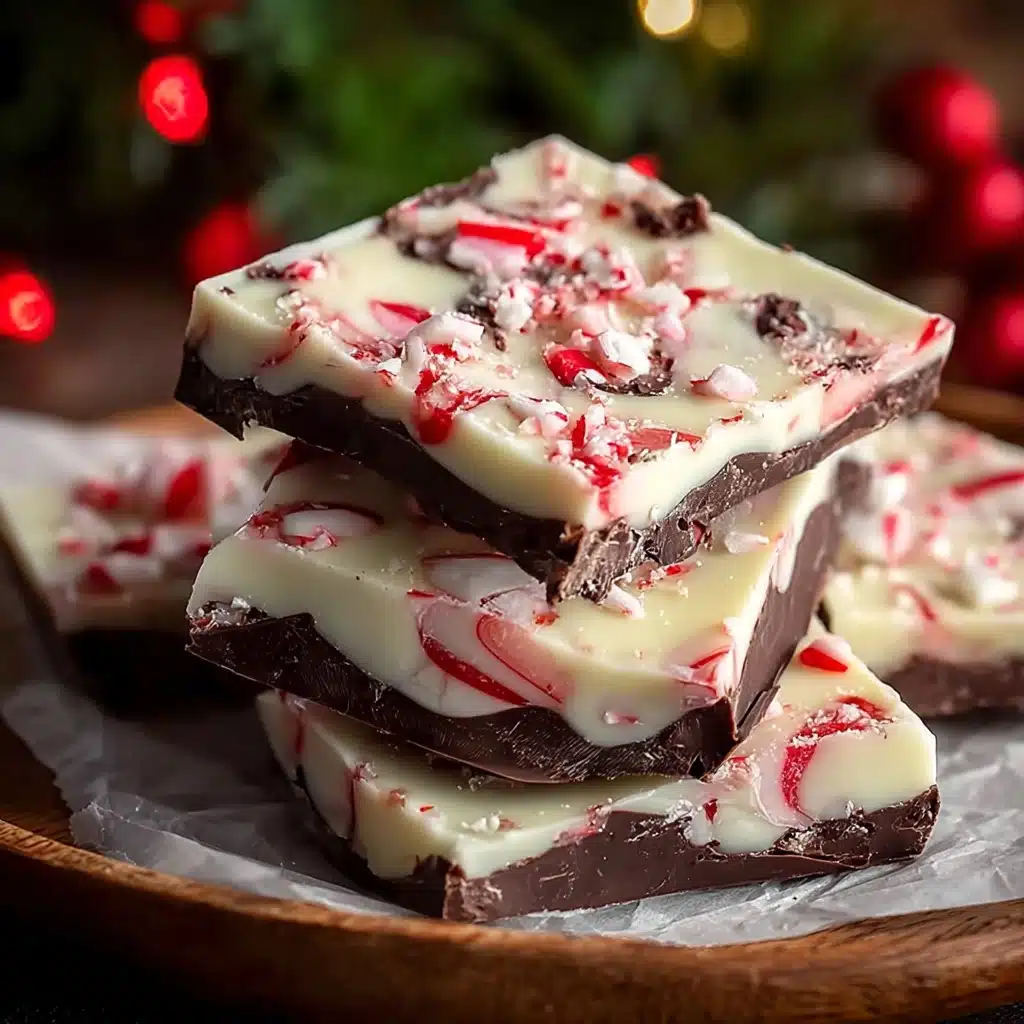
There is something utterly magical about the crunchy, minty delight known as Peppermint Bark. This festive treat combines the rich, bittersweet depth of dark chocolate with the creamy sweetness of white chocolate, all sprinkled generously with crushed candy canes for that invigorating peppermint pop. Whether you’re gifting it, nibbling on it by the fire, or just looking for the perfect holiday treat, Peppermint Bark is a simple yet show-stopping dessert that will make any occasion feel a little more special.

Ingredients You’ll Need
Gathering the right ingredients is half the fun, and for Peppermint Bark, the list is delightfully straightforward but powerful. Each element plays a vital role in creating that classic flavor contrast and textural delight that makes this treat unforgettable.
- 12 oz dark chocolate chips or semi-sweet chocolate chips: Use high-quality chocolate for the best flavor and smooth melting texture that forms the bark’s deep base.
- 12 oz white chocolate chips: Make sure it’s real white chocolate made with cocoa butter for that luscious melt and creamy taste.
- 1/2 tsp peppermint extract (optional): This adds an extra peppermint punch if you want your bark to be extra festive and minty, but feel free to skip it for a subtler flavor.
- 6 pieces candy canes (crushed): Freshly crushed candy canes provide that signature crunch and refreshing bite; you can substitute crushed peppermint candies if you prefer.
How to Make Peppermint Bark
Step 1: Prepare Your Workspace
Start by lining a baking sheet with parchment paper or a silicone baking mat. This helps the bark lift off easily once it’s set and ensures a smooth surface for spreading your chocolate layers.
Step 2: Melt the Dark Chocolate
Place the dark chocolate chips in a microwave-safe bowl and heat them in 30-second bursts, stirring between each interval until smooth and glossy. This gentle melting prevents burning, creating that perfect luscious base for your bark to rest upon.
Step 3: Spread and Chill the Dark Chocolate Layer
Pour the melted dark chocolate onto your prepared baking sheet and spread it evenly to about 1/8-inch thickness. Refrigerate this layer for 10 to 15 minutes to firm up, so it’s ready to hold the next layer without mixing together.
Step 4: Melt the White Chocolate
Repeat the melting process with the white chocolate chips in a clean microwave-safe bowl, using the same 30-second intervals and stirring thoroughly for smoothness and shine.
Step 5: Assemble the Layers
Once the dark chocolate layer is chilled and firm, pour the melted white chocolate over it, spreading it gently but evenly. This contrast of colors and flavors is what makes Peppermint Bark so visually and tastefully delightful.
Step 6: Add the Crushed Candy Canes
Sprinkle the crushed candy canes immediately over the still-wet white chocolate. Gently press them in so they stick securely but don’t fully submerge; this gives you that satisfying crunch in every bite.
Step 7: Chill Until Firm
Place the baking sheet back in the refrigerator for 30 minutes to an hour, allowing the bark to become completely firm and ready to break into pieces.
Step 8: Break and Enjoy
Once fully set, lift the bark from the sheet and break it into irregular pieces with your hands for that rustic, homemade look and feel. Now you have your very own homemade Peppermint Bark ready to share and savor!
How to Serve Peppermint Bark
Garnishes
While Peppermint Bark shines on its own, you can add extra festive flair by dusting pieces lightly with powdered sugar or even drizzling a bit of extra dark or white chocolate over the top. Edible glitter or tiny crushed peppermint bits can also heighten the holiday magic for gift-giving or party platters.
Side Dishes
Serve Peppermint Bark alongside a cozy cup of hot cocoa or a peppermint mocha latte for a match made in heaven. It also pairs beautifully with a cheese board featuring creamy cheeses and fresh fruit, balancing the rich chocolate with a touch of freshness and variety.
Creative Ways to Present
For gifting, package your Peppermint Bark pieces in cute clear bags tied with red and white twine or pastel ribbons. Layer them in decorative tins or stack them between parchment paper in a festive box. These presentation ideas make your homemade treat look like a professional delight, perfect for holiday parties and gift exchanges.
Make Ahead and Storage
Storing Leftovers
Peppermint Bark keeps wonderfully well when stored in an airtight container at room temperature or in the fridge. To maintain maximum crunch and freshness, avoid humid environments or exposure to sunlight.
Freezing
If you want to stash some away for later, freeze your Peppermint Bark in a sealed, freezer-safe container. It freezes beautifully without losing flavor or texture, and you can thaw it at room temperature for about 15 minutes before serving.
Reheating
Generally, Peppermint Bark is best enjoyed chilled or at room temperature, so reheating is not recommended. If your bark softens too much, simply pop it back in the fridge to firm up again before serving. This maintains that delightful snap and minty crunch.
FAQs
Can I use milk chocolate instead of dark chocolate?
Absolutely! Milk chocolate will give your Peppermint Bark a sweeter, creamier base, which many people love. Just keep the chocolate quality high to ensure smooth melting and great flavor.
Is peppermint extract necessary?
Not at all. The crushed candy canes give plenty of peppermint flavor, but adding a little peppermint extract intensifies the taste if you want a stronger mint punch. It’s entirely up to your preference.
Can I make this recipe without a microwave?
Definitely. Use a double boiler to gently melt both chocolates on the stovetop instead. This method offers more control and prevents chocolate from scorching.
How long does Peppermint Bark last?
Stored properly, Peppermint Bark can last up to two weeks at room temperature and even longer in the fridge, making it a great make-ahead treat for holiday events.
Can I add other toppings besides candy canes?
Yes! Feel free to get creative by adding crushed nuts, dried cranberries, or festive sprinkles on top for different textures and flavors. Just sprinkle them onto the white chocolate layer before it sets.
Final Thoughts
Making Peppermint Bark is like wrapping up the holiday spirit in a delicious, crunchy treat that’s as fun to make as it is to share. With just a few simple ingredients and easy steps, you can create a festive dessert that is guaranteed to bring smiles and sweet moments. Give it a try and watch how this classic treat becomes a new favorite in your kitchen!
PrintPeppermint Bark Recipe

This classic Peppermint Bark recipe features layers of smooth dark chocolate and creamy white chocolate, topped with crushed peppermint candies for a festive, refreshing treat perfect for the holidays or any time you want a sweet and minty chocolate delight.
- Prep Time: 15 minutes
- Cook Time: 10 minutes
- Total Time: 1 hour 25 minutes
- Yield: About 24 pieces 1x
- Category: Dessert, Candy
- Method: Microwaving and chilling
- Cuisine: American
- Diet: Vegetarian
Ingredients
Chocolate Layers
- 12 oz dark chocolate chips or semi-sweet chocolate chips (Use high-quality chocolate for best flavor)
- 12 oz white chocolate chips (Ensure it’s real white chocolate made with cocoa butter for better melting and taste)
- 1/2 tsp peppermint extract (optional, adds extra peppermint punch)
Topping
- 6 pieces candy canes, crushed (can swap with crushed peppermint candies if preferred)
Instructions
- Preparation: Line a baking sheet with parchment paper or a silicone baking mat to prevent sticking and ensure easy removal of the bark.
- Melt Dark Chocolate: Place the dark chocolate chips in a microwave-safe bowl. Microwave in 30-second intervals, stirring between each, until the chocolate is fully melted and smooth.
- Spread Dark Chocolate: Pour the melted dark chocolate onto the prepared baking sheet. Use a spatula to spread it evenly to about 1/8-inch thickness. Refrigerate for 10-15 minutes until set.
- Melt White Chocolate: In a separate microwave-safe bowl, melt the white chocolate chips using the same 30-second interval method, stirring until smooth. Stir in the peppermint extract if using.
- Assemble Layers: Pour the melted white chocolate over the chilled dark chocolate layer. Spread it evenly to cover the dark chocolate completely.
- Add Topping: Immediately sprinkle the crushed candy canes over the white chocolate layer. Gently press them in to ensure they stick.
- Chill Bark: Refrigerate the baking sheet for 30 minutes to 1 hour or until the bark is completely firm and set.
- Break Into Pieces: Once firm, remove from the fridge and break the peppermint bark into irregular pieces. Store in an airtight container.
Notes
- Use high-quality chocolate for the best taste and texture.
- If peppermint extract is omitted, the candy canes still provide mint flavor.
- Store peppermint bark in a cool, dry place or refrigerator to keep it firm.
- For a gluten-free version, ensure your candy canes are gluten-free.
- Can be made ahead and stored for up to 2 weeks.
Nutrition
- Serving Size: 1 piece (approx. 20g)
- Calories: 110
- Sugar: 14g
- Sodium: 5mg
- Fat: 6g
- Saturated Fat: 4g
- Unsaturated Fat: 2g
- Trans Fat: 0g
- Carbohydrates: 14g
- Fiber: 1g
- Protein: 1g
- Cholesterol: 0mg
Keywords: Peppermint bark, holiday treats, peppermint chocolate bark, Christmas candy, layered chocolate dessert