Magical Witch Hat Cookies Your Kids Will Adore Recipe
Introduction
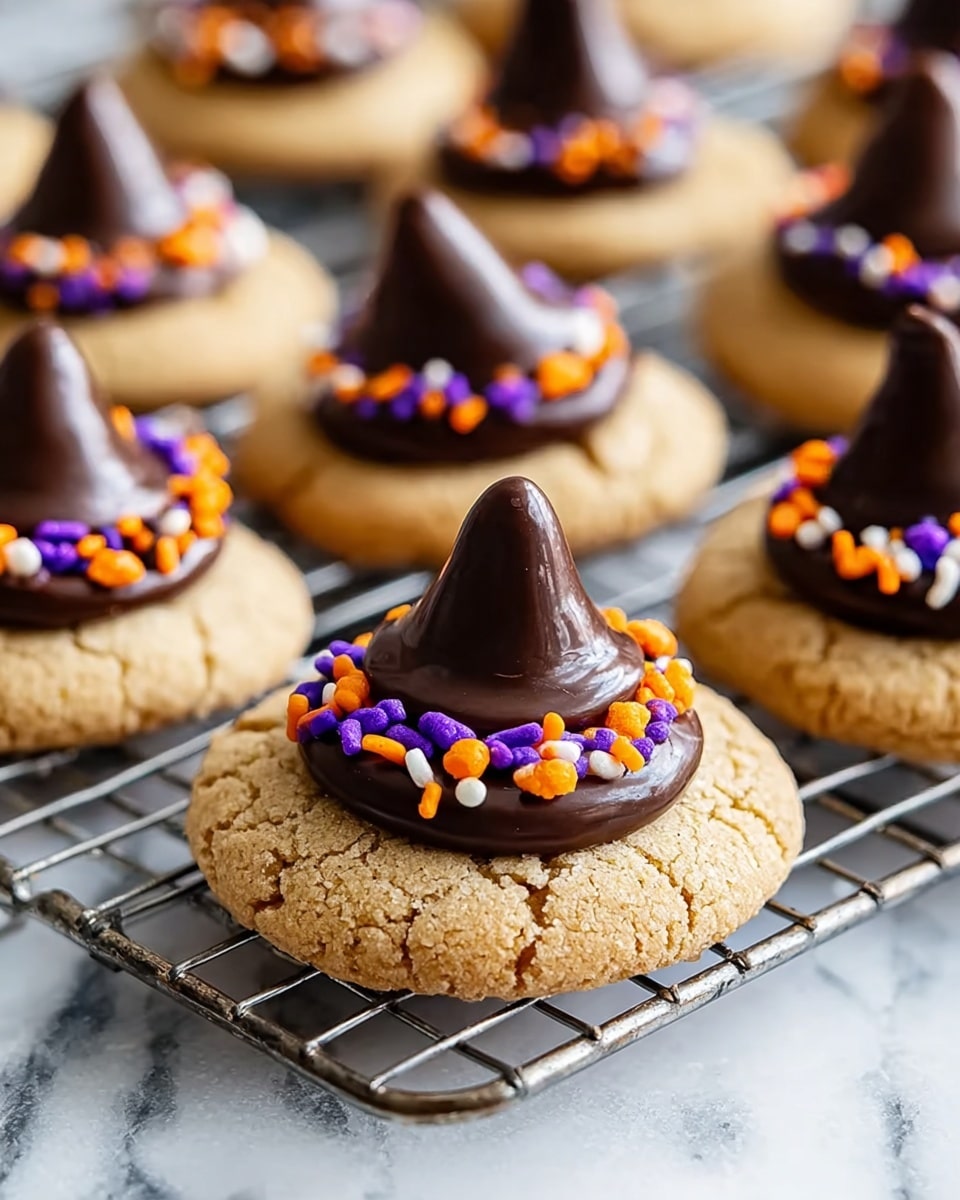
These Magical Witch Hat Cookies are a delightful treat that kids will love making and eating. With a fun shape and colorful frosting, they’re perfect for Halloween or any festive occasion. Plus, they combine peanut butter and chocolate for an irresistible flavor.
Ingredients
- 1 ¾ cup (218 g) all-purpose flour
- 1 teaspoon baking soda
- ¼ teaspoon salt
- ½ cup (100 g) granulated sugar, plus more for rolling cookies in
- ½ cup (100 g) light brown sugar
- ½ cup (128 g) no-stir creamy peanut butter
- ½ cup (113 g or 1 stick) unsalted butter, room temperature
- 1 large egg, room temperature
- 1 teaspoon pure vanilla extract
- 30 chocolate melting wafers
- ½ cup (113 g or 1 stick) unsalted butter, room temperature (for frosting)
- 1 ¼ cups (150 g) confectioners’ sugar, sifted
- 1 teaspoon pure vanilla extract (for frosting)
- Pinch of salt
- 1-2 Tablespoons heavy cream or whole milk, room temperature
- Gel food coloring: orange, purple, green
- 30 chocolate kisses, unwrapped
- Sprinkles (optional)
Instructions
- Step 1: Preheat your oven to 375º F and line a baking sheet with parchment paper. Set it aside.
- Step 2: In a medium bowl, whisk together the flour, baking soda, and salt. Set aside.
- Step 3: In the bowl of a stand mixer, combine granulated sugar, brown sugar, butter, and peanut butter. Beat on medium speed until fluffy, about 2 minutes.
- Step 4: Add the egg and vanilla extract to the mixer. Beat until incorporated, about 30 seconds.
- Step 5: With the mixer on low, slowly add the flour mixture and beat just until combined. Avoid overmixing.
- Step 6: Scoop a full tablespoon of dough and roll it into 1-inch balls. Roll each ball in extra granulated sugar, then place them on the prepared baking sheet. Press down each ball slightly.
- Step 7: Bake the cookies for 10 minutes, or until they turn a light golden brown.
- Step 8: Remove the cookies from the oven. Immediately press a chocolate melting wafer on top of each cookie and gently spread it with the back of a spoon to slightly melt.
- Step 9: Transfer the cookies to a wire rack to cool completely.
- Step 10: To make the frosting, beat the butter until creamy. Gradually add the sifted confectioners’ sugar and continue beating.
- Step 11: Add vanilla extract, heavy cream, and a pinch of salt to the frosting. Mix until smooth and well combined.
- Step 12: Divide the frosting into separate bowls. Add gel food coloring in orange, purple, and green to each bowl and stir until you reach your desired colors.
- Step 13: Transfer each colored frosting to piping bags fitted with round tips.
- Step 14: Frost the bottom of a chocolate kiss and press it firmly onto the hardened chocolate wafer on each cookie to form the witch’s hat.
- Step 15: Decorate the hats with sprinkles if desired, then serve and enjoy!
Tips & Variations
- For a nut-free version, substitute the peanut butter with sunflower seed butter.
- Use dark or white melting wafers to change the look of the hats.
- Try different gel food coloring combinations to customize your witch hats.
- Chilling the dough for 30 minutes before baking can help cookies hold their shape better.
Storage
Store these cookies in an airtight container at room temperature for up to 3 days. For longer storage, keep them in the refrigerator for up to a week. If refrigerated, let the cookies come to room temperature before serving. The frosting may soften slightly when warmed.
How to Serve
Serve this delicious recipe with your favorite sides.
FAQs
Can I use regular chocolate chips instead of melting wafers?
Regular chocolate chips can be used, but they may not melt as evenly or hold the shape of the hat as well as melting wafers.
How do I prevent the frosting colors from bleeding?
Use gel food coloring instead of liquid to keep the frosting thick and prevent colors from running. Also, allow the frosting to set before adding sprinkles or stacking cookies.
PrintMagical Witch Hat Cookies Your Kids Will Adore Recipe
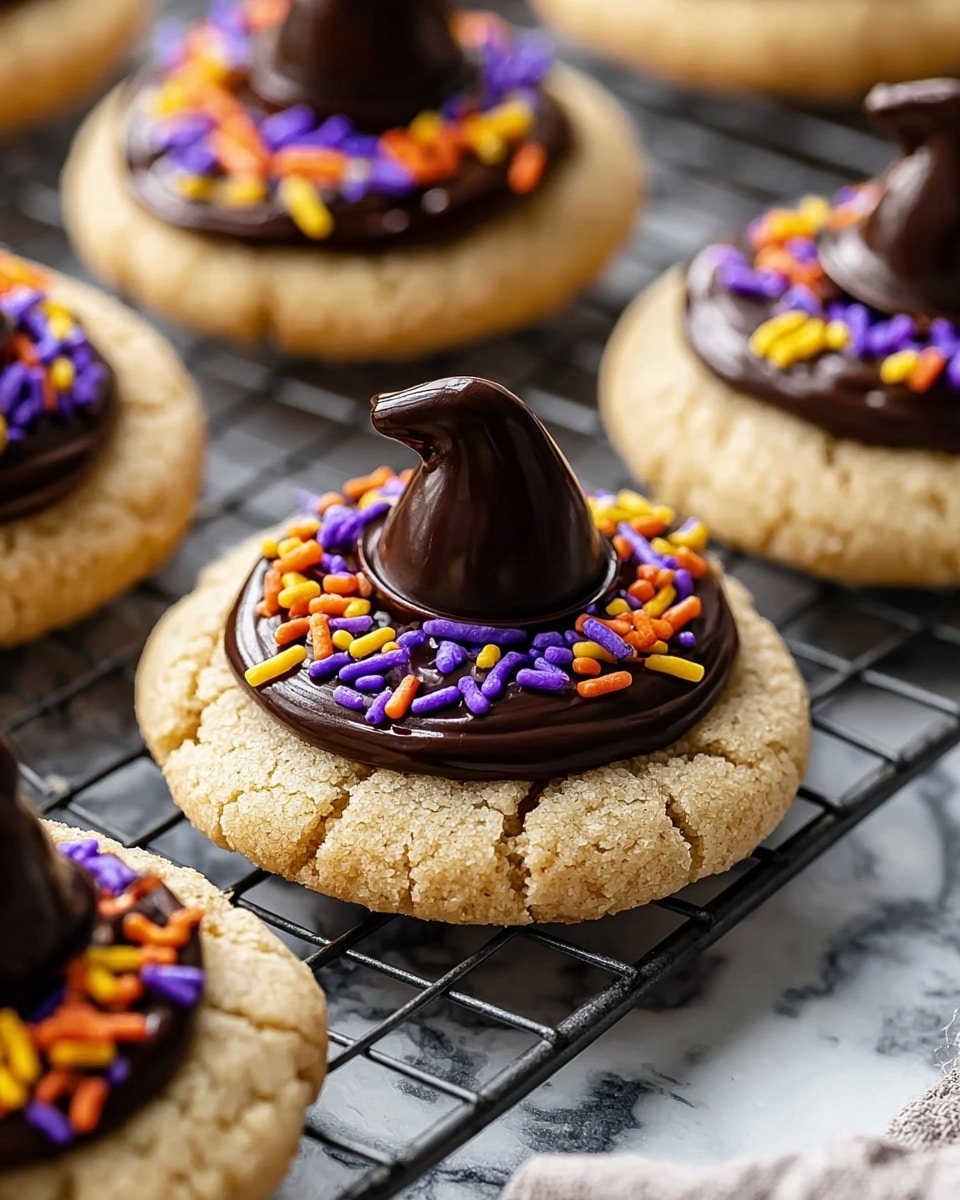
Magical Witch Hat Cookies are a delightful and whimsical treat that kids will absolutely adore. These peanut butter cookies are topped with chocolate wafers and adorned with colorful frosting, chocolate kisses, and sprinkles to resemble charming witch hats, perfect for Halloween or any fun gathering.
- Prep Time: 20 minutes
- Cook Time: 10 minutes
- Total Time: 40 minutes
- Yield: 30 cookies 1x
- Category: Dessert
- Method: Baking
- Cuisine: American
Ingredients
Cookie Dough
- 1 ¾ cup (218 g) all-purpose flour
- 1 teaspoon baking soda
- ¼ teaspoon salt
- ½ cup (100 g) granulated sugar, plus extra for rolling
- ½ cup (100 g) light brown sugar
- ½ cup (128 g) no-stir creamy peanut butter
- ½ cup (113 g or 1 stick) unsalted butter, room temperature
- 1 large egg, room temperature
- 1 teaspoon pure vanilla extract
Topping and Frosting
- 30 chocolate melting wafers
- ½ cup (113 g or 1 stick) unsalted butter, room temperature
- 1 ¼ cups (150 g) confectioners’ sugar, sifted
- 1 teaspoon pure vanilla extract
- Pinch salt
- 1–2 Tablespoons heavy cream or whole milk, room temperature
- Gel food coloring (orange, purple, green)
- 30 chocolate kisses, unwrapped
- Sprinkles for decoration
Instructions
- Preheat and Prepare Baking Sheet: Preheat your oven to 375º F (190º C) and line a baking sheet with parchment paper to prevent sticking and ease cleanup.
- Mix Dry Ingredients: In a medium bowl, whisk together the all-purpose flour, baking soda, and salt. Set this mixture aside for later use.
- Cream Sugars, Butter, and Peanut Butter: In the bowl of a stand mixer, combine the granulated sugar, light brown sugar, butter, and creamy peanut butter. Beat on medium speed until the mixture is fluffy and well combined, about 2 minutes.
- Add Egg and Vanilla: Add the large egg and pure vanilla extract to the mixture. Beat again until fully incorporated, around 30 seconds.
- Combine Dry and Wet Ingredients: Reduce the mixer speed to low and slowly add the flour mixture. Beat just until the dough comes together and there are no dry spots, careful not to overmix.
- Form Cookies: Scoop a full tablespoon of dough and roll into 1-inch balls. Roll each ball in extra granulated sugar, then place on the prepared baking sheet. Press down slightly to flatten them just a bit.
- Bake Cookies: Bake in the preheated oven for 10 minutes or until the cookies are lightly golden brown around the edges.
- Add Chocolate Wafers: Remove the cookies from the oven and immediately press a chocolate melting wafer on top of each cookie. Spread the wafer slightly with the back of a spoon to help it adhere and melt slightly.
- Cool Cookies: Transfer the cookies to a wire rack to cool completely and allow the chocolate wafers to harden.
- Prepare Frosting: In a clean bowl, beat the unsalted butter until creamy. Gradually add the sifted confectioners’ sugar while continuing to beat.
- Add Flavor and Texture to Frosting: Add the pure vanilla extract, pinch of salt, and heavy cream or whole milk. Mix until the frosting is smooth and pipeable.
- Color the Frosting: Divide the frosting into several small bowls. Add gel food coloring (orange, purple, and green) to each bowl and stir until the desired shades are achieved.
- Prepare Piping Bags: Transfer each colored frosting to piping bags fitted with round tips for easy decoration.
- Decorate Cookies: Frost the bottom of a chocolate kiss and press it onto the hardened chocolate wafer on each cookie to form the witch hat point.
- Add Final Touches: Add sprinkles around the base of the chocolate kiss if desired for extra festive flair. Serve and enjoy your magical witch hat cookies!
Notes
- Ensure the butter and egg are at room temperature for best mixing results.
- Use gel food coloring for vibrant frosting colors without thinning the frosting.
- Roll the dough balls in sugar to give cookies a little extra sparkle and crunch.
- Chocolate melting wafers melt smoothly on hot cookies; press them immediately after baking for best results.
- Store cookies in an airtight container at room temperature for up to 3 days.
- For a peanut allergy-friendly option, use sunflower seed butter instead of peanut butter.
Keywords: witch hat cookies, peanut butter cookies, Halloween cookies, kid-friendly cookies, chocolate wafer cookies, festive cookies

