Easy Homemade Waffles with Self Rising Flour Recipe
Introduction
Homemade waffles are a delightful treat that can make any breakfast feel special. This easy recipe uses self-rising flour for a light, crispy texture and comes together quickly with simple ingredients you likely have on hand.
Ingredients
- 2 cups Self Rising Flour (sifted recommended)
- 1/2 cup Corn Starch
- 1/2 tsp Salt
- 3 tbsp Granulated Sugar
- 1 cup Milk (2% or whole recommended)
- 1/2 cup Buttermilk
- 1/3 cup Oil (extra light olive oil for crispiness)
- 2 Eggs
- 1 tsp Vanilla Extract
Instructions
- Step 1: Sift the self-rising flour and corn starch into a medium mixing bowl. Whisk them together until well combined.
- Step 2: In a separate large bowl, whisk together the sugar, oil, milk, buttermilk, eggs, salt, and vanilla extract until smooth.
- Step 3: Gradually add the flour and cornstarch mixture to the wet ingredients, whisking gently to combine. Avoid overmixing; a few small lumps in the batter are okay.
- Step 4: Cover the batter and refrigerate for at least 30 minutes to allow it to rest.
- Step 5: Preheat your waffle iron. Lightly brush with oil if necessary.
- Step 6: Once heated, scoop the batter onto the waffle iron—about one square at a time.
- Step 7: Cook the waffles according to your waffle iron’s instructions until golden and crisp. For reference, cooking at level 4.5 or 5 works well on many irons.
- Step 8: Use non-stick tongs to remove cooked waffles and keep them warm in a preheated 200°F oven. Place them directly on the rack or on a wire rack set over a baking sheet for best crispness.
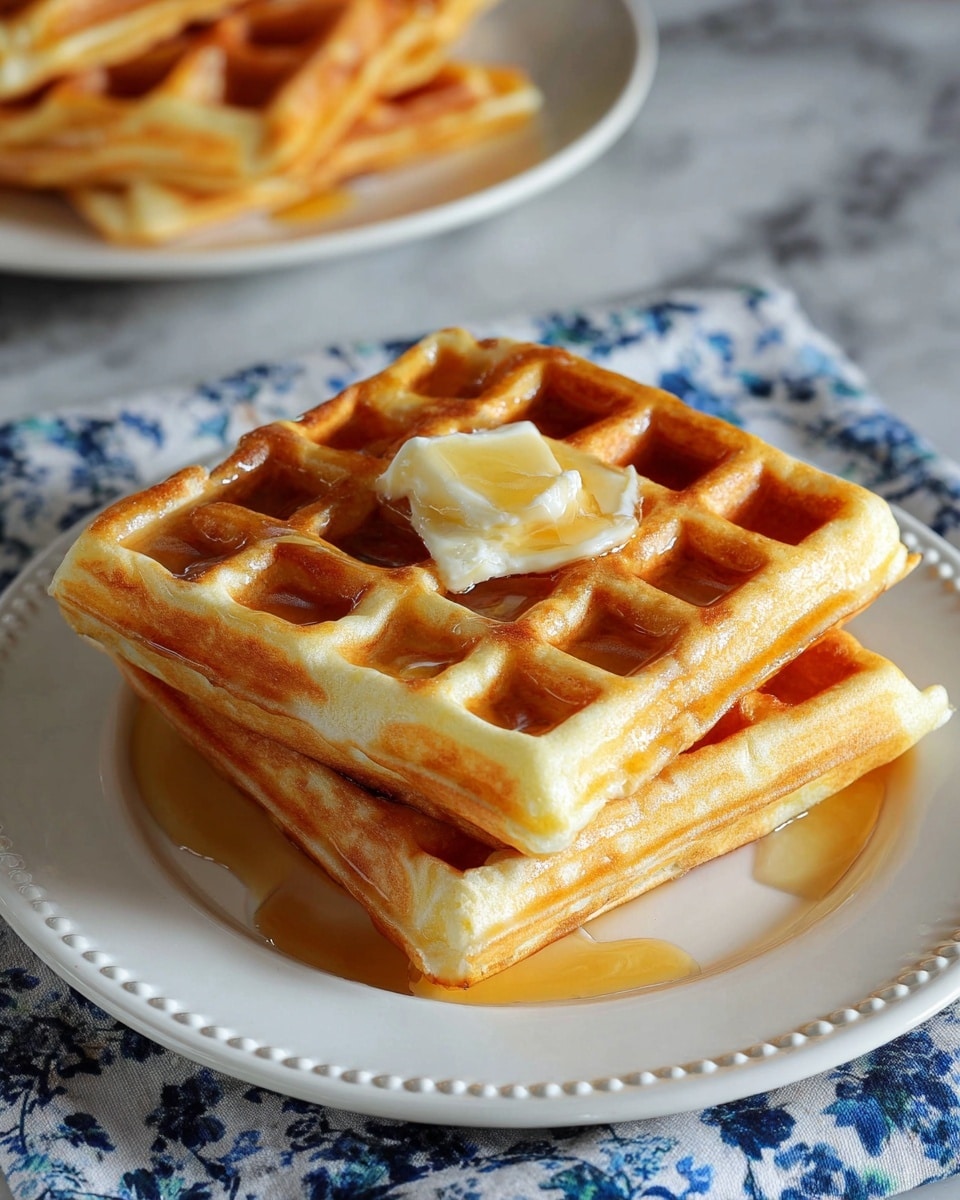
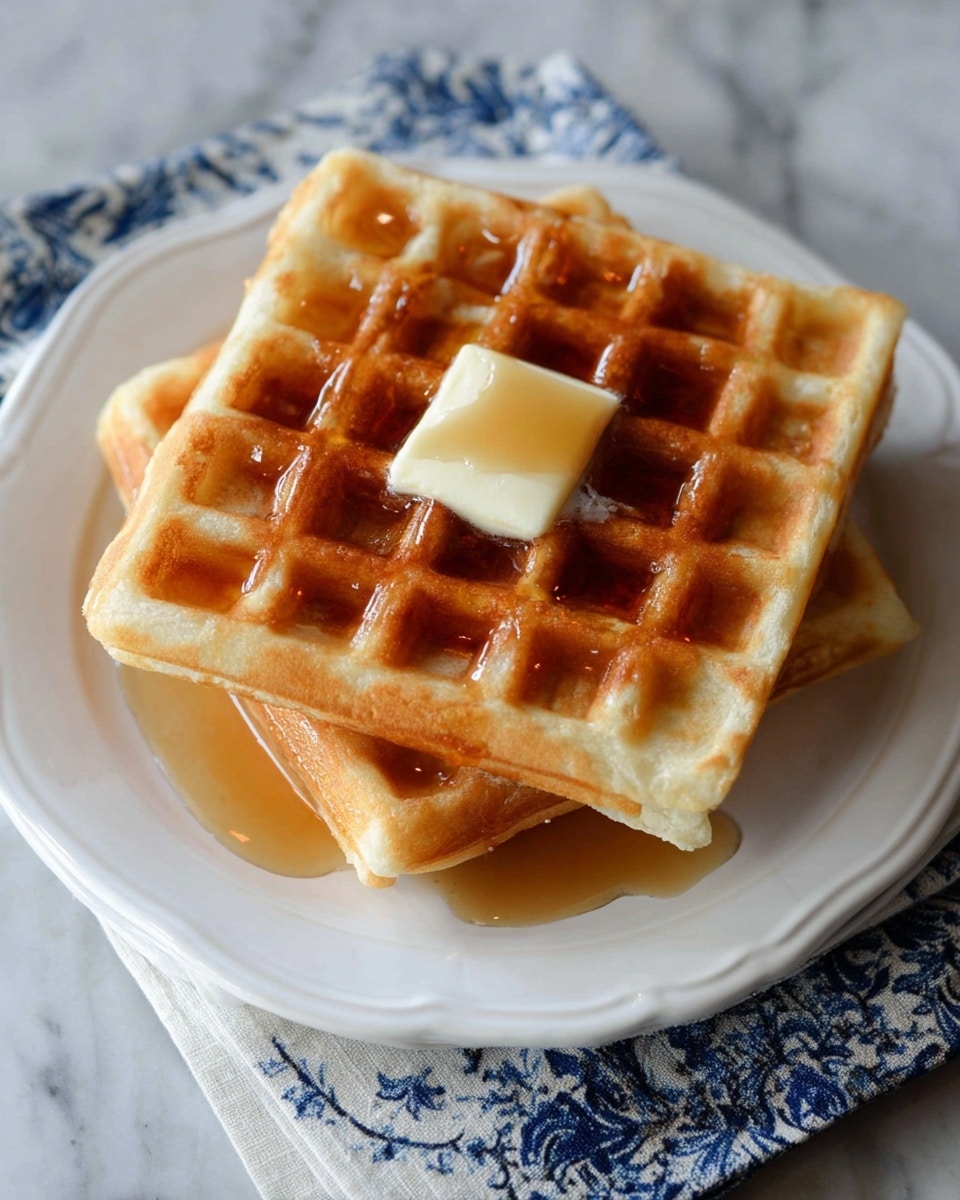
- Step 9: Once all waffles are cooked, add your favorite toppings, serve, and enjoy!
Tips & Variations
- For extra fluffy waffles, separate the eggs, beat the whites until stiff peaks form, and fold them into the batter just before cooking.
- Swap buttermilk with plain yogurt or a milk and lemon juice mixture if you don’t have buttermilk.
- Try adding cinnamon or nutmeg to the dry ingredients for a warm flavor twist.
Storage
Store leftover waffles in an airtight container in the refrigerator for up to 2 days or freeze them for up to 1 month. Reheat by toasting or warming in the oven at 350°F until heated through and crisp.
How to Serve
Serve this delicious recipe with your favorite sides.
FAQs
Can I use regular flour instead of self-rising flour?
You can, but you’ll need to add 1 1/2 tsp baking powder and 1/2 tsp salt per cup of all-purpose flour to mimic self-rising flour’s leavening.
What oil works best in this recipe?
Extra light olive oil is recommended for a crispier waffle, but vegetable oil or melted butter also work well if you prefer richer flavor.
PrintEasy Homemade Waffles with Self Rising Flour Recipe

This Easy Homemade Waffles recipe uses self-rising flour and simple ingredients to create light, crispy waffles with a tender interior. Perfect for breakfast or brunch, these waffles are quick to prepare and come out golden and delicious every time, with a hint of vanilla and a crispy texture thanks to light olive oil.
- Prep Time: 10 minutes
- Cook Time: 20 minutes
- Total Time: 30 minutes
- Yield: 6–8 waffles 1x
- Category: Breakfast
- Method: Baking
- Cuisine: American
Ingredients
Dry Ingredients
- 2 Cups Self Rising Flour (sifted recommended)
- 1/2 cup Corn Starch
- 1/2 tsp Salt
- 3 tbsp Granulated Sugar
Wet Ingredients
- 1 cup Milk (2% or whole recommended)
- 1/2 cup Buttermilk
- 1/3 cup Extra Light Olive Oil (or melted butter)
- 2 Eggs
- 1 tsp Vanilla Extract
Instructions
- Prepare Dry Ingredients: Sift the self-rising flour and cornstarch together into a medium mixing bowl. Whisk to combine thoroughly, breaking up any lumps.
- Combine Wet Ingredients: In a separate large mixing bowl, whisk together the sugar, oil, milk, buttermilk, eggs, salt, and vanilla extract until fully blended.
- Mix Batter: Gradually add the flour and cornstarch mixture into the wet ingredients, whisking gently to combine. Avoid overmixing; it’s okay if the batter is slightly lumpy.
- Rest the Batter: Cover the bowl and refrigerate the batter for at least 30 minutes to allow the ingredients to meld and improve texture.
- Preheat Waffle Iron: While the batter rests, preheat your waffle iron. If necessary, lightly brush it with oil to prevent sticking.
- Cook Waffles: Remove batter from the fridge and use a large cookie scoop to pour batter into the waffle iron, one square at a time. Cook according to your waffle iron’s instructions until the waffles are golden brown and crispy, typically at a heat setting around 4.5 to 5.
- Keep Warm: Remove cooked waffles carefully using non-stick tongs and place them in a preheated oven at 200°F to keep warm and maintain crispiness. You can place them directly on the rack or on a wire rack over a baking sheet.
- Serve: Once all waffles are cooked, add your favorite toppings such as syrup, fresh fruit, or whipped cream. Serve immediately and enjoy your homemade crispy waffles!
Notes
- Resting the batter improves the waffle texture, making them lighter and crispier.
- Using extra light olive oil instead of butter gives a crispier waffle, but butter can be used for a richer flavor.
- Sifting the flour ensures a smoother batter and lighter waffles.
- Do not overmix the batter to avoid tough waffles; a few lumps are fine.
- Keeping waffles warm in the oven prevents them from getting soggy before serving.
- For fluffier waffles, ensure your buttermilk is fresh to activate the leavening in the self-rising flour.
Keywords: homemade waffles, easy waffles, self rising flour waffles, crispy waffles, breakfast waffles, buttermilk waffles