Biscoff Cheesecake Recipe
Introduction
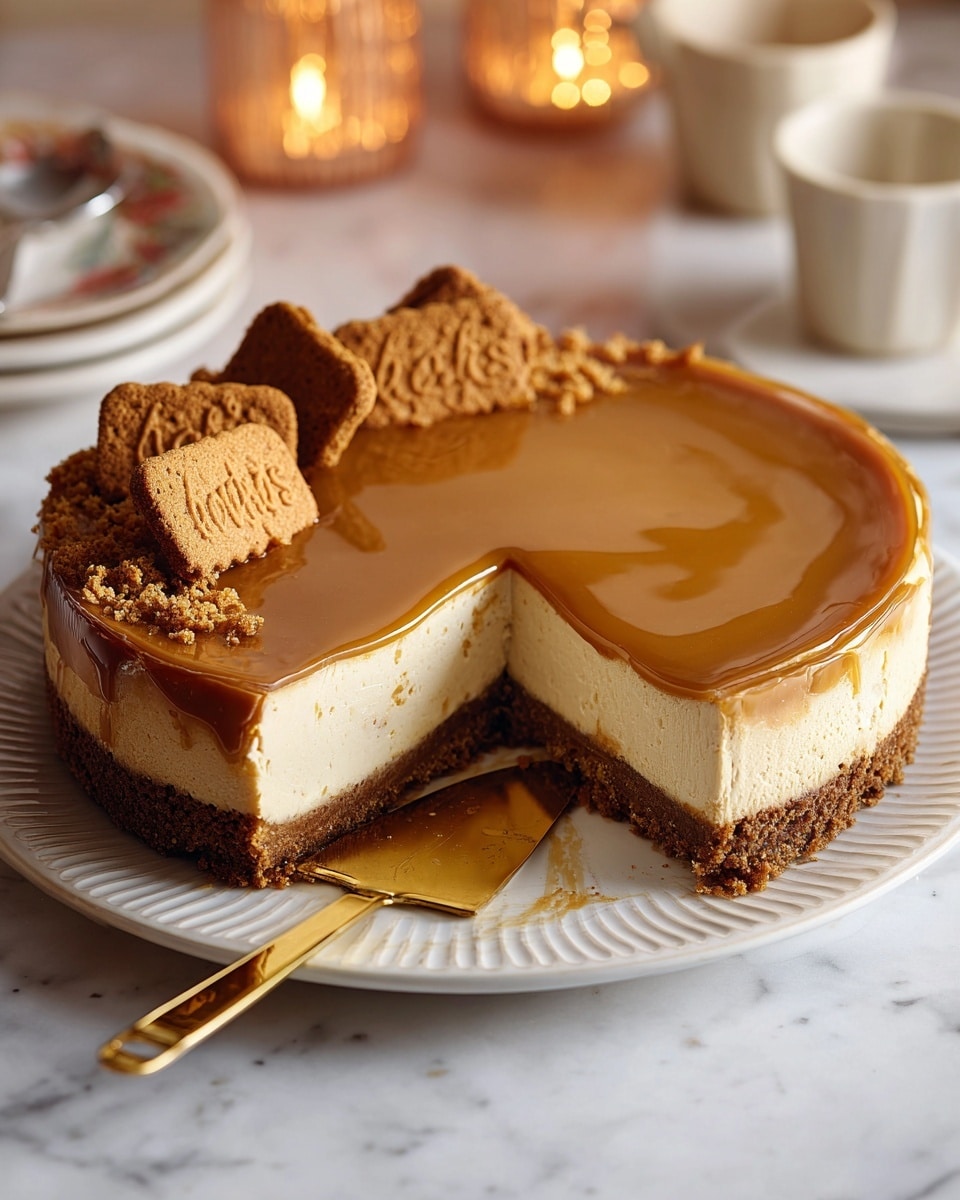
This Biscoff Cheesecake is a decadent treat that combines the rich creaminess of classic cheesecake with the irresistible flavor of biscoff cookies and spread. Perfect for special occasions or whenever you want an indulgent dessert that’s sure to impress.
Ingredients
- 350 g biscoff cookies (about 45 cookies)
- 150 g unsalted butter (melted)
- 920 g cream cheese (4 bricks, softened to room temperature)
- 150 g granulated sugar
- 150 g Greek yogurt (room temperature)
- 1 tablespoon vanilla extract
- 1 teaspoon ground cinnamon
- 4 large eggs (room temperature)
- 150 g biscoff spread (warmed until runny)
- Biscoff cookies (as many as you’d like, for garnish)
Instructions
- Step 1: Line a 9-inch springform pan with parchment paper and set aside.
- Step 2: Crush the biscoff cookies using a food processor or place them in a Ziploc bag and crush with a rolling pin until finely ground. Transfer to a medium bowl.
- Step 3: Stir the melted butter into the cookie crumbs until the mixture resembles wet sand.
- Step 4: Press the crumb mixture evenly into the bottom and up the sides of the prepared pan using the bottom of a flat cup. Chill the crust in the refrigerator while you prepare the filling.
- Step 5: Preheat your oven to 325°F (163°C).
- Step 6: In a large bowl, beat the cream cheese, sugar, Greek yogurt, vanilla extract, and cinnamon with an electric mixer or spatula until smooth and creamy, with no lumps.
- Step 7: Add eggs one at a time, mixing well after each addition until fully incorporated.
- Step 8: Pour the cheesecake batter over the chilled crust in the pan.
- Step 9: Place an empty baking tray on the bottom oven rack and pour about 1 inch of hot water into it to create a water bath. Bake the cheesecake on the middle rack for 65–70 minutes, until the edges are set but the center still jiggles slightly.
- Step 10: Allow the cheesecake to cool completely at room temperature, then refrigerate for at least 4 hours or overnight to set fully.
- Step 11: Once chilled, carefully run a spatula or skewer around the edges to release the cheesecake from the pan. Transfer it to a serving plate.
- Step 12: Warm the biscoff spread until runny, then pour and spread evenly over the top of the cheesecake before it sets.
- Step 13: Garnish with crumbled biscoff cookies and additional whole cookies if desired. Serve and enjoy!
Tips & Variations
- For a firmer crust, bake the crust alone for 8-10 minutes before adding the filling.
- Swap Greek yogurt for sour cream for a tangier flavor.
- Use an electric mixer to ensure the cream cheese mixture is smooth and lump-free for the best texture.
- Add a pinch of salt to balance the sweetness if preferred.
- Top with whipped cream or caramel drizzle for an extra indulgence.
Storage
Store the cheesecake covered in the refrigerator for up to 4 days. Keep it tightly wrapped or in an airtight container to prevent it from drying out. For best flavor and texture, consume within this time frame. Reheat the biscoff spread separately if needed before serving again.
How to Serve
Serve this delicious recipe with your favorite sides.
FAQs
Can I make this cheesecake in advance?
Yes, this cheesecake is best made a day ahead to allow it to set fully and develop its flavors. It can be refrigerated overnight.
What can I use if I don’t have biscoff spread?
If biscoff spread isn’t available, you can substitute with cookie butter or a similar spiced cookie spread, although the unique biscoff flavor is what makes this cheesecake special.
PrintBiscoff Cheesecake Recipe

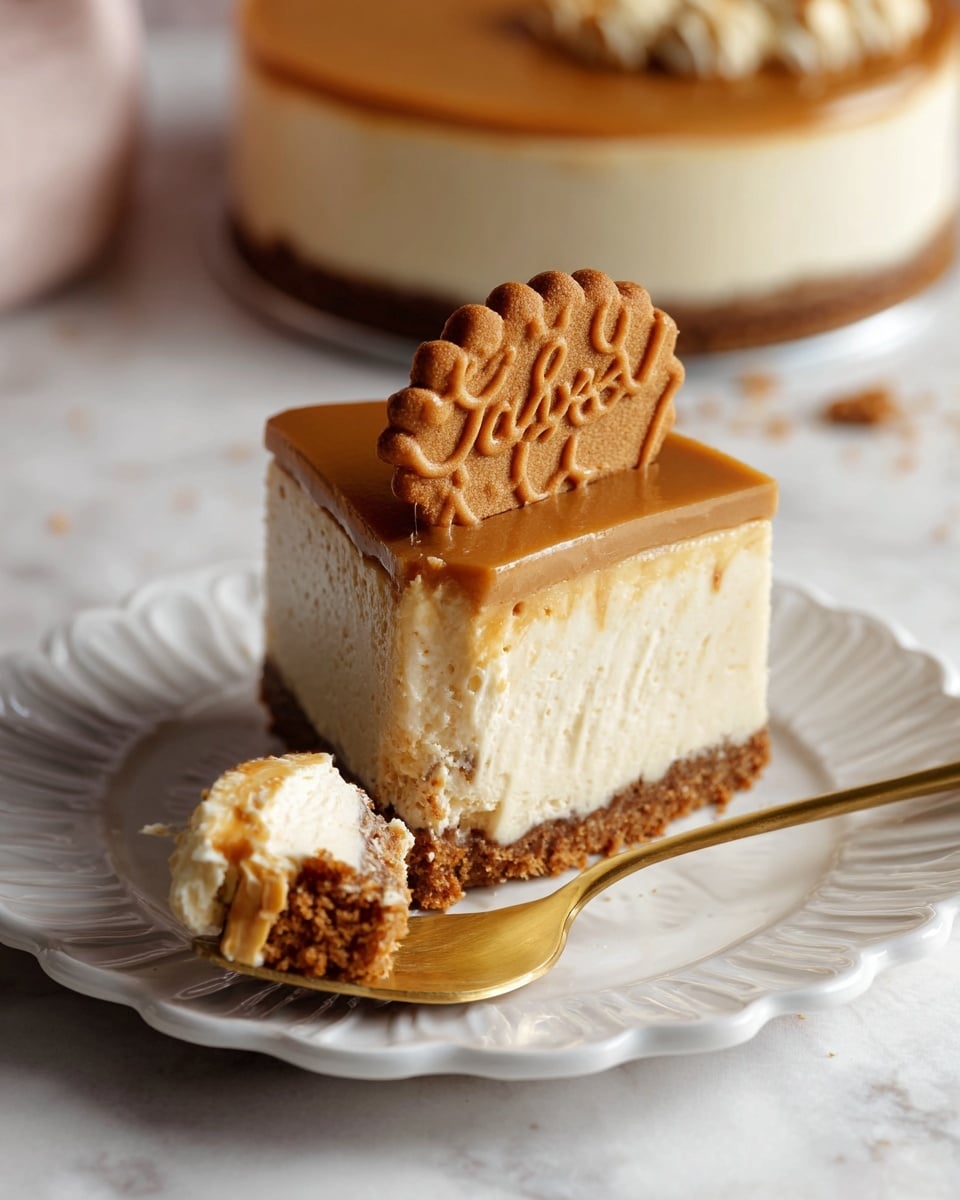
This decadent Biscoff Cheesecake features a crunchy Biscoff cookie crust with a creamy, cinnamon-infused cream cheese filling. Topped with a luscious layer of warm Biscoff spread and garnished with crumbled Biscoff cookies, this dessert combines rich flavors and smooth textures perfect for any sweet tooth craving.
- Prep Time: 25 minutes
- Cook Time: 70 minutes
- Total Time: 5 hours 35 minutes
- Yield: 12 servings 1x
- Category: Dessert
- Method: Baking
- Cuisine: American
Ingredients
Crust
- 350 g Biscoff cookies (about 45 cookies)
- 150 g unsalted butter, melted
Cheesecake Filling
- 920 g cream cheese (4 bricks), softened to room temperature
- 150 g granulated sugar
- 150 g Greek yogurt, room temperature
- 1 tablespoon vanilla extract
- 1 teaspoon ground cinnamon
- 4 large eggs, room temperature
Toppings
- 150 g Biscoff spread, warmed until runny
- Biscoff cookies, to garnish as desired
Instructions
- Prepare the crust: Line a 9-inch springform pan with parchment paper and set aside. Crush the Biscoff cookies finely using a food processor or by placing them in a ziplock bag and rolling with a rolling pin. Transfer the crumbs to a medium bowl.
- Mix crust: Stir melted butter into the crushed cookies until the mixture resembles wet sand.
- Form crust: Press the cookie mixture evenly into the bottom and up the sides of the lined pan using the bottom of a flat-bottomed cup. Chill the crust in the refrigerator while preparing the filling.
- Preheat oven: Set oven to 325°F (163°C).
- Make cheesecake batter: In a large bowl, combine cream cheese, granulated sugar, Greek yogurt, vanilla extract, and ground cinnamon. Beat with an electric mixer or spatula until smooth and creamy, free of lumps. Incorporate eggs one at a time, mixing well after each addition until fully combined.
- Assemble cheesecake: Pour the batter over the chilled crust in the springform pan.
- Bake with water bath: Place an empty pan or baking tray on the bottom rack of the oven and fill it with about 1 inch of hot water. Bake the cheesecake on the middle rack for 65-70 minutes, until the edges are set but the center still jiggles slightly.
- Cool and chill: Allow the cheesecake to cool completely at room temperature. Then refrigerate for at least 4 hours or overnight to set fully.
- Prepare toppings: Once chilled, run a spatula or skewer around the edge to release the cheesecake from the pan and transfer to a serving dish. Pour the warm, runny Biscoff spread evenly over the top and spread gently with an offset spatula before it sets.
- Garnish: Crumble additional Biscoff cookies on top and around the cheesecake for garnish. Add whole cookies for an extra decorative touch if desired.
Notes
- Make sure all dairy ingredients and eggs are at room temperature to ensure a smooth cheesecake batter without lumps.
- The water bath during baking helps prevent cracking and promotes a creamy texture.
- You can store the cheesecake covered in the refrigerator for up to 4 days.
- For easier slicing, run a knife under hot water, dry it, and then slice the cheesecake.
Keywords: Biscoff cheesecake, creamy cheesecake, cookie crust cheesecake, Biscoff spread dessert