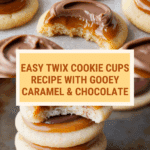
Twix Cookie Cups Recipe
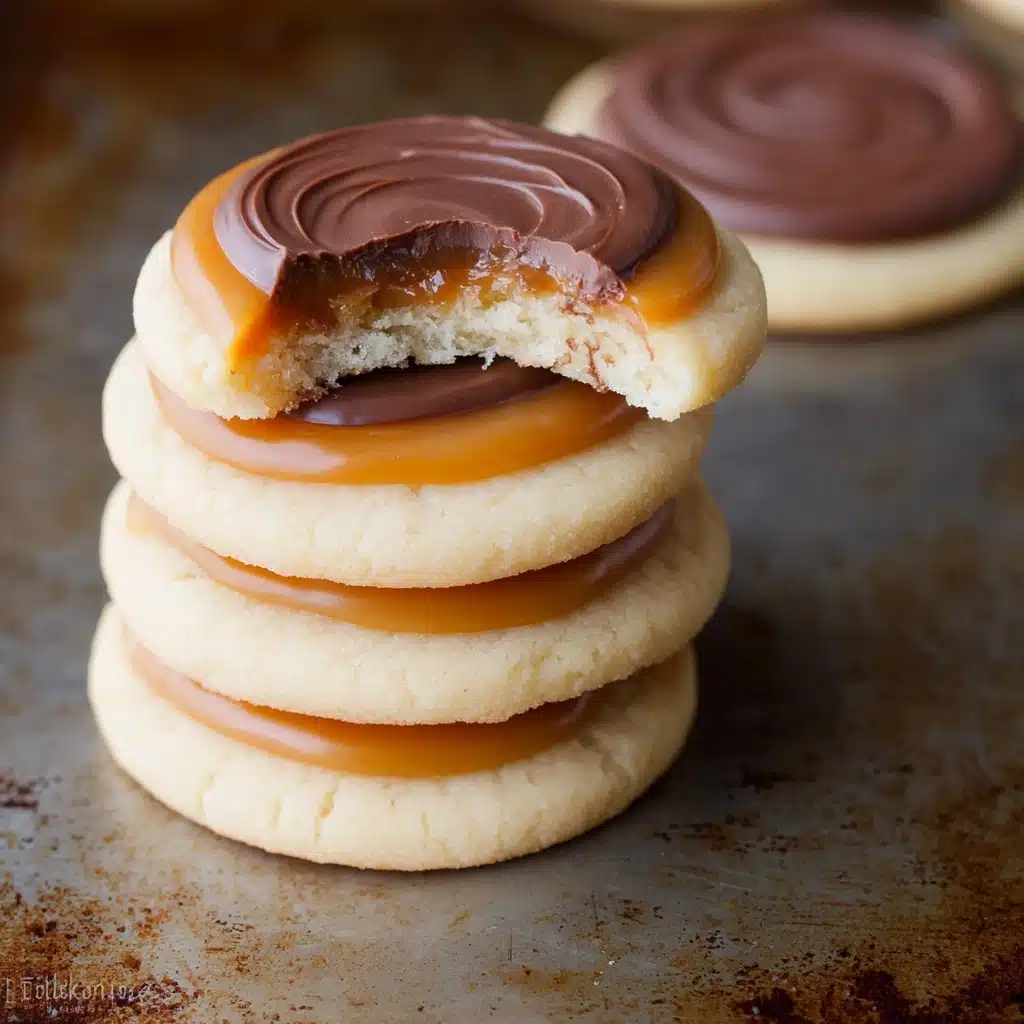
If you are looking for a playful and indulgent treat that combines the best of caramel, chocolate, and buttery cookies, look no further than these delightful Twix Cookie Cups. Imagine crunchy yet tender cookie bases holding luscious, creamy caramel centers that are then drenched in smooth milk chocolate. These Twix Cookie Cups are not only a spectacular dessert to serve at gatherings but also a heartwarming snack to enjoy with a cup of coffee or tea. You’ll be hooked after just one bite, and once you try making them at home, they will quickly become your new favorite go-to sweet!

Ingredients You’ll Need
Gathering the right ingredients is the first step to making these irresistible Twix Cookie Cups. Each one plays a critical role, whether it’s adding richness, chew, or that classic sweet finish. From the soft, salted butter to the shiny milk chocolate chips, these ingredients come together to create a perfectly balanced dessert.
- Salted butter (1/2 cup / 111g): Provides richness and a tender crumb to the cookie base.
- Granulated sugar (1/2 cup / 115g): Adds sweetness and helps with the cookie’s texture.
- Vanilla extract (1 tsp): Boosts flavor depth and enhances the sweetness.
- Egg white (1): Binds the ingredients together without making the dough too heavy.
- All-purpose flour (1 1/2 cups / 228g): The foundation of the cookie, providing structure and shape.
- Baking powder (1 tsp): Lightens the dough so your cookie cups aren’t dense.
- Caramels (20, unwrapped): The star ingredient, delivering a gooey, melt-in-your-mouth center.
- Milk (1 tbsp): Used to soften the caramel for a luscious filling.
- Milk chocolate chips (2 cups / 400g): Creates the final smooth chocolate coating that snuggles each cookie cup.
How to Make Twix Cookie Cups
Step 1: Preheat and Prepare the Dough
Start by heating your oven to 350°F (175°C). This prime temperature ensures that the cookie cups bake evenly to just the right tenderness. Meanwhile, cream together the salted butter and granulated sugar until light and fluffy. This step is crucial for giving your cookies a soft texture and subtle buttery sweetness.
Step 2: Add Vanilla and Egg White
Once your butter and sugar are perfectly creamed, stir in the vanilla extract and egg white. These ingredients give your cookie dough richness and moisture, while the vanilla adds that familiar, comforting aroma that makes the kitchen smell divine.
Step 3: Mix in Dry Ingredients
Combine the all-purpose flour and baking powder, then slowly fold them into your wet mixture. This brings the dough together with just the right balance of chewiness and structure, setting the stage for the cookie cups to hold their shape during baking.
Step 4: Shape the Cookie Cups
Roll out the dough on a lightly floured surface until it’s about 1/4 to 1/2 inch thick. Use a round cookie cutter to cut out circles – these will be your cup bases. Transfer just the cut cookies to an ungreased baking pan, spacing them slightly apart.
Step 5: Bake Until Puffy
Bake your cookie rounds at 350°F for 6-8 minutes. The cookies should look puffy and lose their glossy sheen, signaling they’re perfectly done yet still soft enough to cradle the caramel filling.
Step 6: Cool Completely
After baking, move the cookies to a wire rack and let them cool fully. This cooling period is essential to make sure the caramel and chocolate layers won’t melt or slide off later.
Step 7: Prepare the Caramel Filling
While the cookies cool, microwave the caramels and milk in 30-second increments, stirring between intervals, until smooth and creamy. This silky caramel will be spooned generously onto each cookie, creating that signature Twix-style gooey center.
Step 8: Assemble the Caramel Layer
Gently spoon a few teaspoons of the warm caramel onto each cookie, spreading it out almost to the edges. To help it set, place the cookie and caramel-covered tray in the fridge for 10-15 minutes until completely chilled.
Step 9: Melt and Spread the Chocolate
Finally, melt the milk chocolate chips using short 30-second bursts in the microwave, stirring in between to keep it smooth. Spread a thin, even layer of this melted chocolate over the caramel for a glossy, luscious finish. Let the cookies cool again so the chocolate sets perfectly before enjoying.
How to Serve Twix Cookie Cups
Garnishes
For an extra special touch, sprinkle a pinch of flaky sea salt over the top of the chocolate just before it hardens. This contrast highlights the sweet elements beautifully. Alternatively, garnish with finely chopped nuts or even some crushed Twix bars for an added crunch and visual appeal.
Side Dishes
Serve these Twix Cookie Cups alongside a warm cup of coffee, hot chocolate, or even a cold glass of milk to balance their sweet richness. They’re also fantastic when paired with fresh berries or a scoop of vanilla ice cream if you want to create a more elaborate dessert experience.
Creative Ways to Present
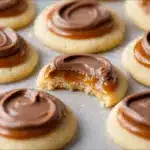
Lay them out on a charming dessert platter with colorful linens for a party or arrange them in individual mini cupcake liners for a polished look. You can even stack a couple for a mini cookie tower that’s both impressive and fun to eat.
Make Ahead and Storage
Storing Leftovers
If you have any Twix Cookie Cups left after the party, store them in an airtight container at room temperature for up to 3 days. The cookies will maintain their texture and the chocolate won’t get sticky, so every bite stays just as delicious as the first.
Freezing
For longer storage, freeze the cookie cups individually on a parchment-lined tray, then transfer them to a sealed container or freezer bag. They’ll keep their deliciousness for up to 2 months. When you’re ready to enjoy, thaw them at room temperature to preserve their perfect texture.
Reheating
If you prefer your Twix Cookie Cups slightly warm, pop them in a low oven (about 300°F) for 5 minutes or microwave briefly for about 10 seconds. Be cautious not to overheat or the chocolate may melt too much, but a little warmth brings out the gooey caramel perfectly.
FAQs
Can I use salted or unsalted butter?
Either is fine, but salted butter enhances the flavor by adding a subtle savory note that balances the sweetness better. If using unsalted butter, consider adding a pinch of salt to your dough.
Can I substitute caramel candies with homemade caramel?
Absolutely! If you have homemade caramel, it can work beautifully and will be just as creamy, but the store-bought caramels are a quick, convenient option that yields consistent results.
What’s the best way to melt chocolate so it doesn’t seize?
Use short bursts in the microwave and stir frequently. Alternatively, melt the chocolate in a heatproof bowl over a pot of simmering water (double boiler method) to keep control over the temperature.
Can I make these cookie cups vegan or dairy-free?
With a few swaps, yes! Use a butter substitute and dairy-free chocolate chips, and make sure your caramels are also vegan-friendly. The texture might vary slightly but the deliciousness will still be there.
How thick should I roll the dough for the cookie cups?
Rolling the dough to about 1/4 to 1/2 inch thick strikes the perfect balance – too thin and they won’t hold the filling well, too thick and the texture can be doughy. This thickness makes them tender but sturdy enough for the caramel and chocolate layers.
Final Thoughts
Making Twix Cookie Cups at home is such a sweet adventure – the combination of textures, flavors, and that homemade charm simply can’t be beat. Whether you’re looking to impress guests or just treat yourself after a long day, these cookie cups provide the perfect little indulgence. Give the recipe a whirl, and I bet you’ll be making Twix Cookie Cups again and again, sharing that cozy happiness with everyone you love.
PrintTwix Cookie Cups Recipe
These Twix Cookie Cups are a delightful treat that combines a buttery cookie base with a gooey caramel center, topped with a rich layer of milk chocolate. Perfect for satisfying your sweet tooth with the iconic flavors of Twix bars in an easy-to-make homemade dessert.
- Prep Time: 20 minutes
- Cook Time: 8 minutes
- Total Time: 40 minutes
- Yield: 24 cookie cups 1x
- Category: Dessert
- Method: Baking
- Cuisine: American
- Diet: Vegetarian
Ingredients
Cookie Dough
- 1/2 cup (111g) salted butter
- 1/2 cup (115g) granulated sugar
- 1 tsp vanilla extract
- 1 egg white
- 1 1/2 cups (228g) all-purpose flour
- 1 tsp baking powder
Caramel Layer
- 20 caramels (unwrapped)
- 1 tbsp milk
Chocolate Topping
- 2 cups (400g) milk chocolate chips
Instructions
- Preheat the oven: Preheat your oven to 350°F (177°C) to ensure it’s at the right temperature when you’re ready to bake the cookies.
- Cream butter and sugar: In a mixing bowl, cream together the salted butter and granulated sugar until the mixture is light and fluffy, which provides a tender cookie texture.
- Add egg white and vanilla: Mix in the egg white and vanilla extract until well combined, ensuring the dough is smooth and cohesive.
- Incorporate dry ingredients: Add the all-purpose flour and baking powder to the wet ingredients, mixing thoroughly until all are fully combined to form the dough.
- Shape the cookies: Roll the dough out to a thickness of 1/4 to 1/2 inch on a lightly floured surface. Use a round cookie cutter to cut out circles, then transfer them onto an ungreased baking pan.
- Bake: Bake the cookies in the preheated oven for 6-8 minutes, or until the cookies are puffy and no longer glossy. This ensures a soft yet slightly firm cookie base.
- Cool the cookies: Remove the cookies from the oven and transfer them to a wire rack. Allow them to cool completely before adding the toppings to prevent melting.
- Prepare caramel layer: While the cookies cool, microwave the unwrapped caramels and milk for 1 minute, stirring at the 30-second mark. Continue stirring until the caramel mixture is smooth and creamy.
- Apply caramel: Spoon a few teaspoons of the warm caramel onto each cooled cookie. Spread it evenly until it almost covers the cookie’s surface for a luscious layer.
- Chill cookies: Place the cookies with caramel in the refrigerator for 10-15 minutes, or until the caramel is completely cold and set.
- Melt chocolate: Melt the milk chocolate chips in 30-second intervals in the microwave, stirring between intervals until fully melted and smooth.
- Top with chocolate: Spread a small amount of melted chocolate over each cookie, covering the caramel. Allow the chocolate to cool and set before serving to ensure it hardens into a delicious topping.
Notes
- Use ungreased pans to help cookies hold their shape.
- Make sure cookies are completely cooled before adding caramel to prevent melting and spreading.
- Microwave chocolate in short intervals to avoid burning.
- Store the Twix Cookie Cups in an airtight container in the refrigerator for up to 5 days.
- For a firmer caramel layer, allow even longer chilling time.
Nutrition
- Serving Size: 1 cookie cup
- Calories: 190
- Sugar: 15g
- Sodium: 85mg
- Fat: 10g
- Saturated Fat: 6g
- Unsaturated Fat: 3g
- Trans Fat: 0g
- Carbohydrates: 23g
- Fiber: 1g
- Protein: 2g
- Cholesterol: 20mg
Keywords: Twix, Cookie Cups, caramel cookies, chocolate, dessert, homemade, easy cookies