Brazilian Cheese Bread (Pão de Queijo) Recipe
Introduction
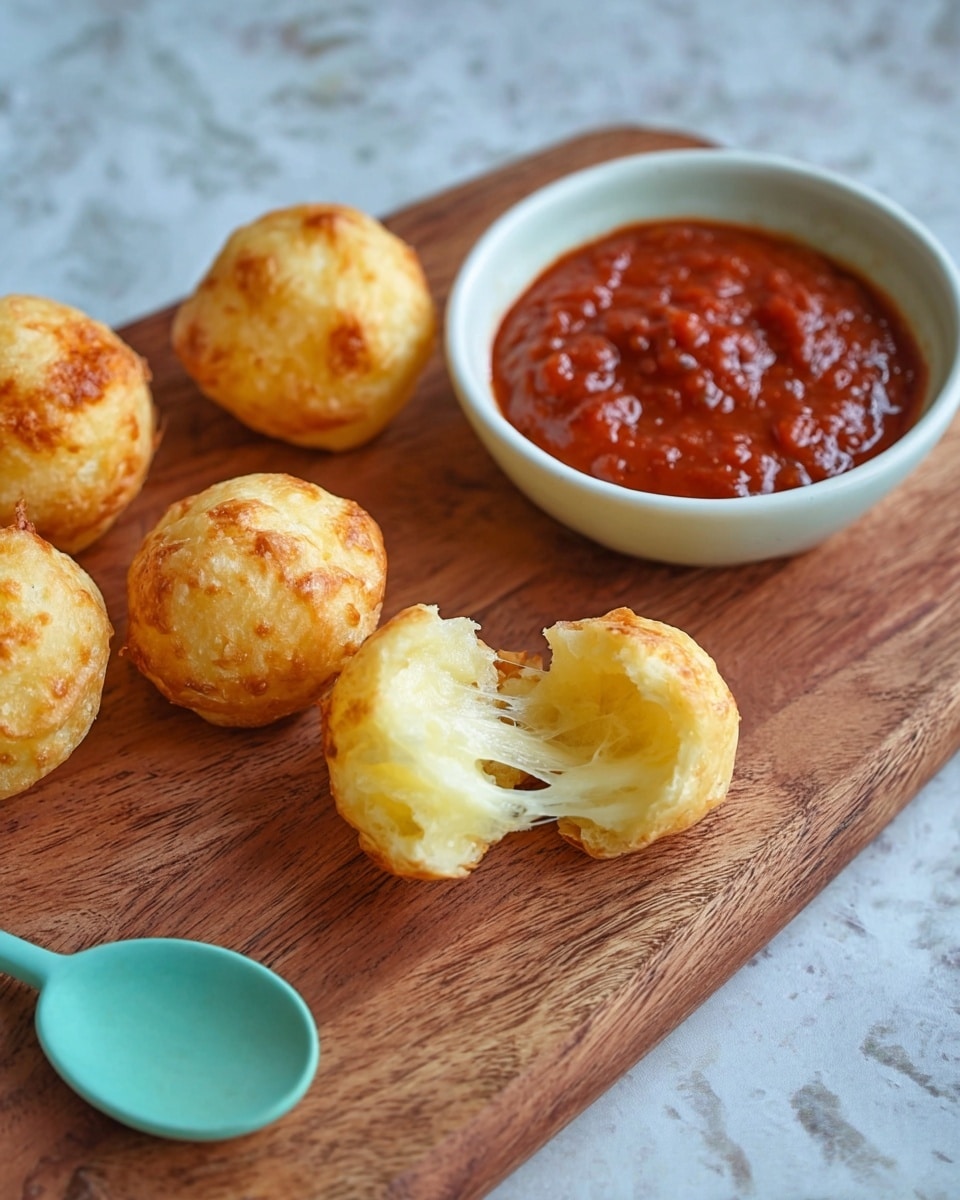
Brazilian Cheese Bread, or Pão de Queijo, is a delightful gluten-free snack known for its chewy texture and cheesy flavor. These little cheese puffs are perfect for breakfast, snacks, or alongside meals. Easy to make and irresistibly tasty, they’re a favorite in Brazilian cuisine.

Ingredients
- 1 cup Tapioca flour
- 1/2 cup Milk (room temperature)
- 1/4 cup Vegetable oil
- 1 Large egg (room temperature)
- 1/2 tsp Salt
- 1/4 cup Mozzarella cheese
- 1/4 cup Cheddar cheese
Instructions
- Step 1: Preheat the oven to 400°F (200°C).
- Step 2: In a blender or food processor, combine tapioca flour, milk, vegetable oil, salt, and egg. Pulse several times until the mixture forms a smooth batter.
- Step 3: Add both cheeses to the batter and pulse a couple of times to incorporate them evenly without overmixing.
- Step 4: Grease a mini muffin pan generously to prevent sticking.
- Step 5: Fill each muffin cup halfway with the batter, leaving room for the bread to puff up as it bakes.
- Step 6: Bake in the preheated oven for 15 to 20 minutes, or until the edges are crusty and the tops are lightly browned. About 15 minutes usually works well.
- Step 7: Remove from the oven and let the cheese bread rest in the pan for a couple of minutes. Carefully transfer to a bowl and serve warm.
Tips & Variations
- Use a mix of cheeses for richer flavor—try Parmesan, Gouda, or a sharper cheddar to vary the taste.
- Make sure all ingredients are at room temperature to help achieve the best texture.
- Serve fresh and warm, as these breads harden when cooled but can be refreshed in a warm oven.
Storage
Store leftover Brazilian Cheese Bread in an airtight container at room temperature for up to 1 day or in the refrigerator for 2 to 3 days. To reheat, warm them in a 350°F (175°C) oven for 5 to 7 minutes to restore their crisp exterior and chewy center.
How to Serve
Serve this delicious recipe with your favorite sides.
FAQs
Can I make Brazilian Cheese Bread without a blender or food processor?
Yes, you can mix the ingredients by hand using a whisk or spoon, but the batter may take longer to become smooth and well combined.
Is tapioca flour the same as tapioca starch?
Yes, tapioca flour and tapioca starch are the same ingredient and can be used interchangeably in this recipe.
PrintBrazilian Cheese Bread (Pão de Queijo) Recipe

This Brazilian Cheese Bread, or Pão de Queijo, is a delightful gluten-free snack made from tapioca flour and a combination of mozzarella and cheddar cheeses. With a crispy outer crust and a chewy, cheesy interior, these mini breads are perfect for breakfast, appetizers, or a tasty snack anytime. The recipe uses simple ingredients and comes together quickly with the help of a blender and oven baking.
- Prep Time: 10 minutes
- Cook Time: 15 minutes
- Total Time: 25 minutes
- Yield: 12 mini cheese breads 1x
- Category: Snack
- Method: Baking
- Cuisine: Brazilian
- Diet: Gluten Free
Ingredients
Dry Ingredients
- 1 cup Tapioca flour
- 1/2 tsp Salt
- 1/4 cup Mozzarella cheese
- 1/4 cup Cheddar cheese
Wet Ingredients
- 1/2 cup Milk (room temperature)
- 1/4 cup Vegetable oil
- 1 Large egg (room temperature)
Instructions
- Preheat the oven: Preheat your oven to 400°F (200°C) to prepare for baking the cheese breads.
- Combine Ingredients: In a blender or food processor, add the tapioca flour, milk, vegetable oil, salt, and egg. Blend by pulsing a few times until you achieve a smooth batter consistency.
- Add Cheese: Add the mozzarella and cheddar cheeses to the batter, then pulse a couple more times just to combine the cheese evenly throughout the mixture without over-processing.
- Prepare the pan: Liberally grease a mini muffin pan to prevent sticking and ensure easy removal of the cheese breads after baking.
- Fill the muffin pan: Spoon the batter into each mini muffin cup until it is about halfway full. This allows room for the breads to puff up as they bake.
- Bake: Place the pan in the preheated oven and bake for 15 to 20 minutes, or until the breads develop a crusty exterior and are lightly browned. Usually, 15 minutes is sufficient.
- Cool and serve: Remove the pan from the oven and let the cheese breads rest in the pan for a couple of minutes. Then carefully transfer them to a bowl and serve warm for the best flavor and texture.
Notes
- For the best texture, make sure all wet ingredients (milk and egg) are at room temperature before mixing.
- You can substitute the mozzarella and cheddar cheeses with other mild, melty cheeses if preferred.
- The tapioca flour is essential for the chewy, chewy texture unique to Pão de Queijo; do not substitute with other flours.
- These cheese breads are best served warm but can be reheated in the oven for a few minutes to revive their crispiness.
- If you do not have a mini muffin pan, a regular muffin pan can be used but the baking time may need slight adjustment.
Keywords: Brazilian cheese bread, Pão de Queijo, tapioca flour bread, gluten-free cheese bread, Brazilian snack, cheesy bread bites