Oreo Dirt Cake Recipe
Introduction
Oreo Dirt Cake is a fun, no-bake dessert that’s creamy, rich, and full of chocolatey Oreo flavor. It’s perfect for family gatherings or when you want a simple yet delicious treat that kids and adults will love.
Ingredients
- 14 ounces Oreos
- 4 tablespoons butter (softened)
- 8 ounces cream cheese (softened)
- 1 cup confectioners sugar
- 3 1/2 cups milk
- 2 large boxes instant vanilla pudding (10.2 ounces total)
- 12 ounces Cool Whip (1 1/2 small containers)
Instructions
- Step 1: Use a food processor to crush the Oreos. Sprinkle half of the crushed Oreos in the bottom of an ungreased 9 x 13 inch pan. Set the remaining Oreos aside for topping.
- Step 2: In a mixing bowl, use an electric mixer to cream together the softened butter, cream cheese, and confectioners sugar until smooth and fluffy.
- Step 3: In a separate large bowl, whisk together the instant vanilla pudding mix and milk until it thickens.
- Step 4: Fold the Cool Whip into the pudding mixture gently until combined.
- Step 5: Add spoonfuls of the creamed butter and cream cheese mixture to the pudding mixture, stirring well to combine everything evenly. Then pour this mixture over the crushed Oreos in the pan.
- Step 6: Sprinkle the remaining crushed Oreos evenly over the top. Refrigerate for at least 4 hours before serving to let it set and flavors meld.
Tips & Variations
- For extra texture, add a handful of chopped nuts or chocolate chips between the layers.
- Use chocolate pudding instead of vanilla for a richer, deeper chocolate flavor.
- If you don’t have a food processor, place Oreos in a sealed plastic bag and crush with a rolling pin.
- Let the dessert chill overnight for the best flavor and consistency.
Storage
Store the Oreo Dirt Cake covered in the refrigerator for up to 3 days. It’s best enjoyed cold. If needed, you can gently stir the cake before serving if it separates slightly. Do not freeze, as the texture may change.
How to Serve
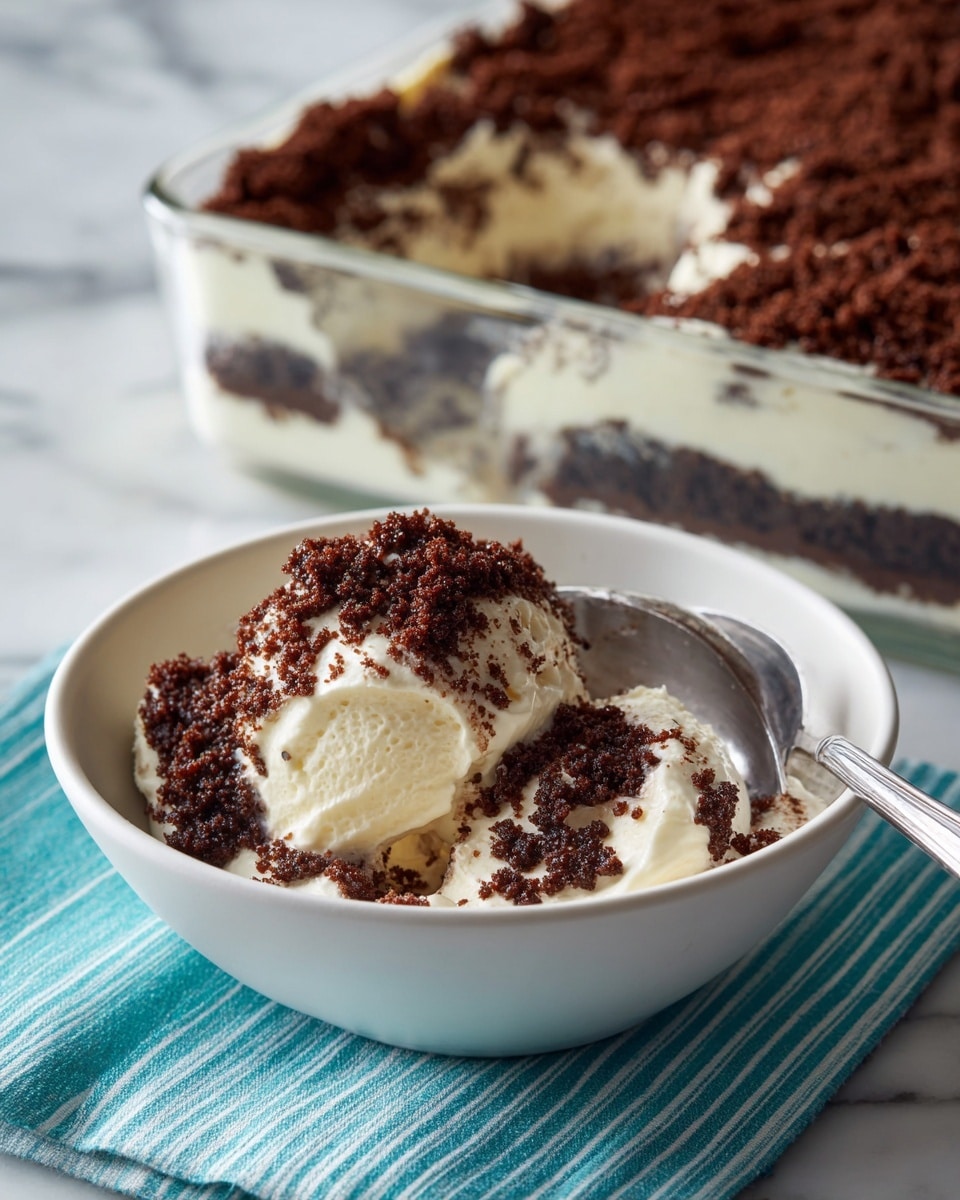
Serve this delicious recipe with your favorite sides.
FAQs
Can I make this dessert ahead of time?
Yes, Oreo Dirt Cake actually tastes better if made a few hours or even a day ahead to allow the flavors to blend and the dessert to set properly.
Can I use reduced-fat ingredients?
You can substitute lower-fat versions of cream cheese and Cool Whip, but the dessert may be less creamy and rich in texture.
PrintOreo Dirt Cake Recipe

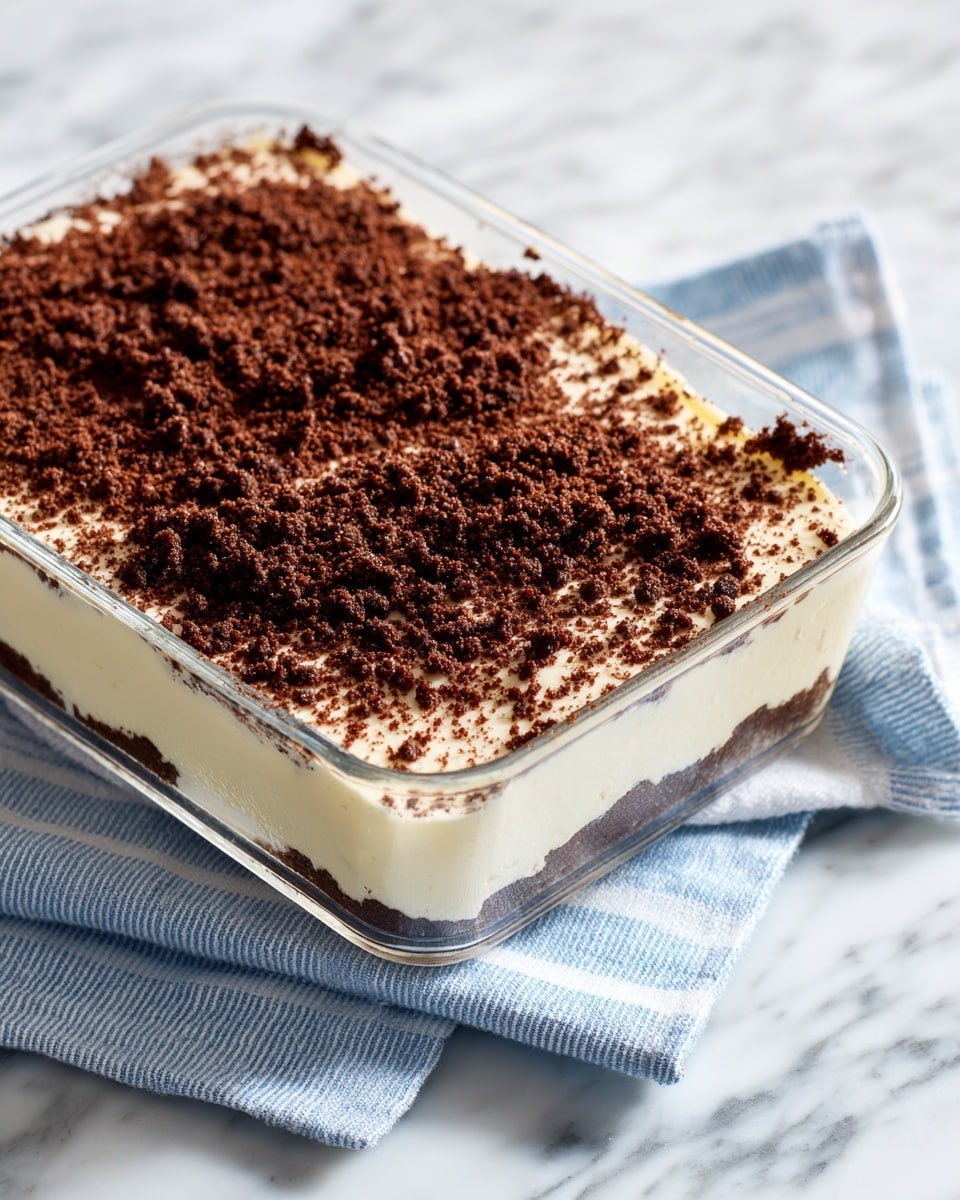
Oreo Dirt Cake is a no-bake dessert featuring layers of crushed Oreos, a creamy mixture of butter, cream cheese, and powdered sugar, combined with instant vanilla pudding and Cool Whip. This easy-to-make treat resembles dirt with Oreo cookie ‘soil’ layers and is perfect for parties or a quick indulgence.
- Prep Time: 15 minutes
- Cook Time: 0 minutes
- Total Time: 15 minutes
- Yield: 12 servings 1x
- Category: Dessert
- Method: No-Cook
- Cuisine: American
Ingredients
Crushed Oreos
- 14 ounces Oreos
Cream Cheese Mixture
- 4 tablespoons butter, softened
- 8 ounces cream cheese, softened
- 1 cup confectioners sugar
Pudding Mixture
- 3 1/2 cups milk
- 2 large boxes instant vanilla pudding (10.2 ounces total)
- 12 ounces Cool Whip (1 1/2 small containers)
Instructions
- Crush Oreos: Use a food processor to crush the Oreos. Sprinkle half of the crushed Oreos evenly in the bottom of an ungreased 9 x 13 inch pan. Set the remaining crushed Oreos aside for layering on top.
- Mix Cream Cheese Mixture: Using an electric mixer, cream together the softened butter, softened cream cheese, and confectioners sugar until smooth and well combined.
- Prepare Pudding: In a large separate bowl, whisk together the instant vanilla pudding mix and the milk until the mixture thickens according to the pudding package instructions.
- Fold in Cool Whip: Gently fold the Cool Whip into the pudding mixture to create a light and fluffy texture.
- Combine Mixtures: Add spoonfuls of the cream cheese mixture to the pudding mixture, mixing well to combine all components thoroughly.
- Assemble the Dirt Cake: Pour the combined creamy pudding mixture on top of the crushed Oreos in the pan, spreading it evenly.
- Top with Oreos: Sprinkle the remaining crushed Oreos over the top of the creamy layer to finish the dirt cake with a crunchy Oreo ‘soil’ topping.
Notes
- Use softened butter and cream cheese for easier mixing and a smoother cream cheese mixture.
- Let the dessert chill in the refrigerator for at least 2 hours before serving for best texture and flavor.
- This dessert can be stored covered in the refrigerator for up to 3 days.
- For added fun, you can decorate the top with gummy worms to mimic a dirt and worm effect.
- Ensure the pudding mix is instant to avoid the need for cooking.
Keywords: Oreo Dirt Cake, no bake dessert, Oreo pudding dessert, easy party dessert, instant pudding cake