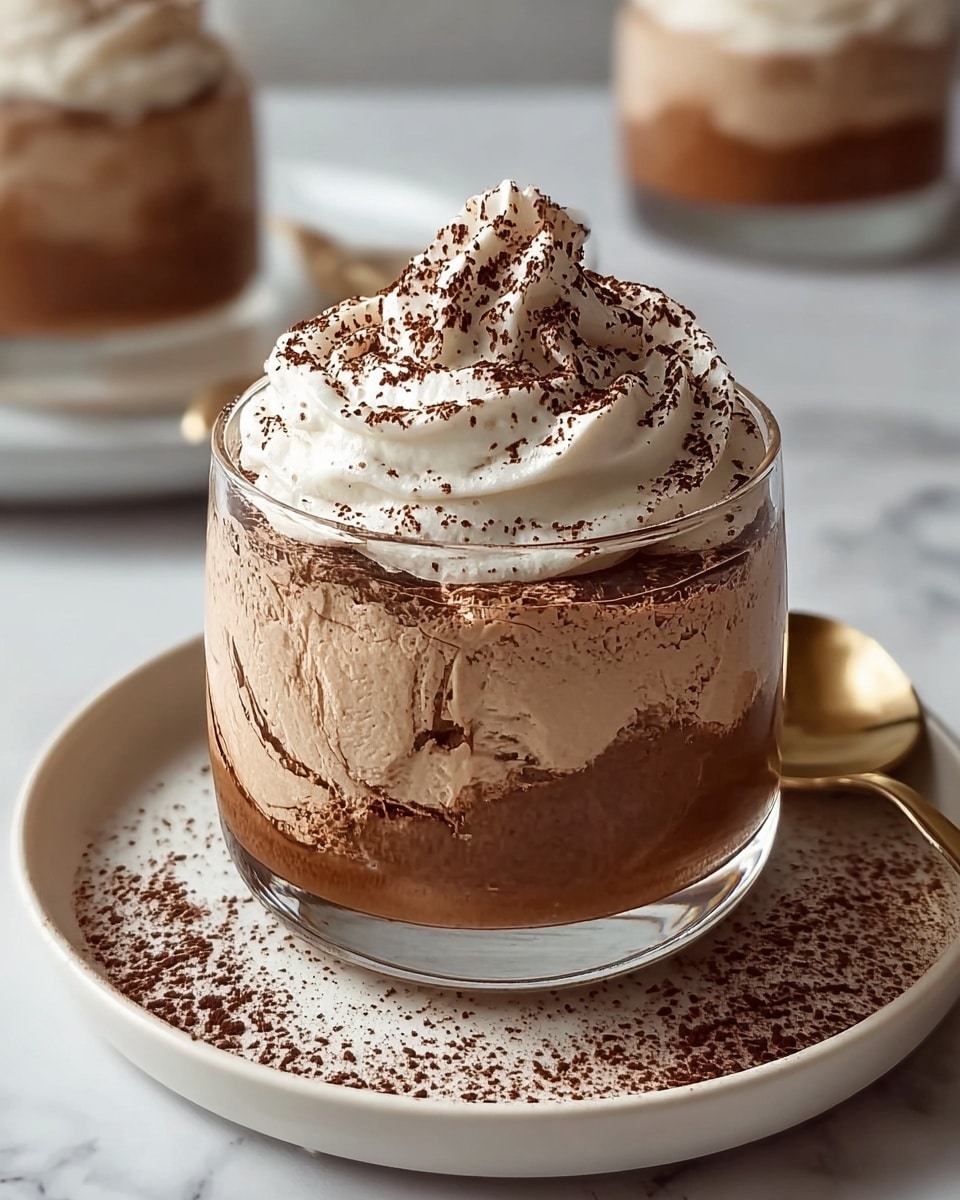
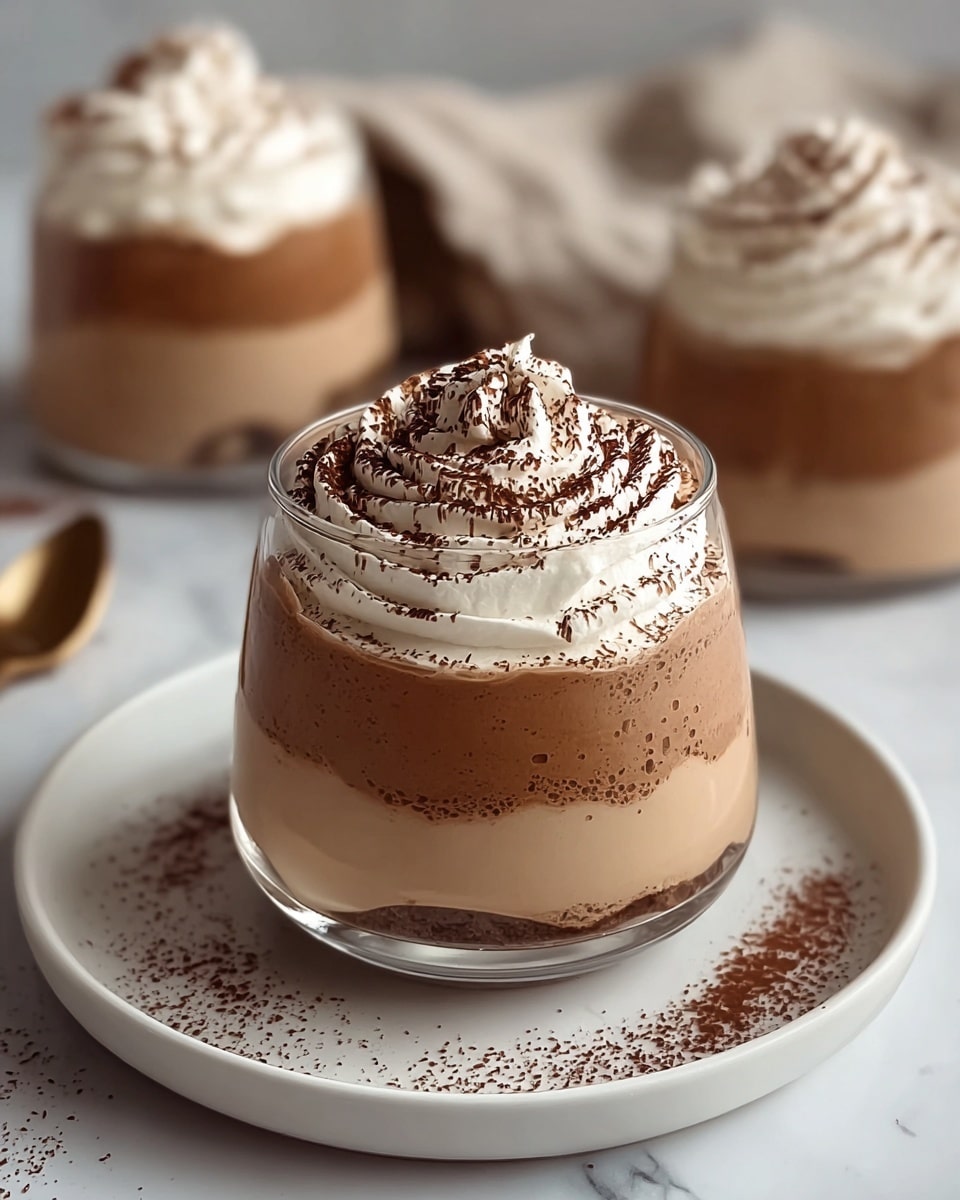
Coffee Mousse Recipe
Introduction
This Coffee Mousse is a light, creamy dessert that’s perfect for coffee lovers seeking a quick and elegant treat. Its smooth texture and rich flavor make it an ideal ending to any meal or a delightful afternoon pick-me-up.
Ingredients
- 1 tablespoon instant espresso powder or instant coffee
- 1 tablespoon hot water
- 1 cup heavy whipping cream, chilled
- 1/2 cup powdered sugar
- 4 oz cream cheese, softened
- 1 teaspoon vanilla extract
- Cocoa powder or chocolate shavings for garnish (optional)
Instructions
- Step 1: In a small bowl, dissolve the instant espresso powder or instant coffee in the hot water. Set it aside to cool slightly.
- Step 2: In a large bowl, beat the chilled heavy whipping cream with powdered sugar until soft peaks form. Set aside.
- Step 3: In another bowl, beat the softened cream cheese until smooth. Mix in the dissolved coffee mixture and vanilla extract until well combined.
- Step 4: Gently fold the whipped cream into the coffee and cream cheese mixture until fully incorporated, taking care not to deflate the mousse.
- Step 5: Spoon the mousse into serving cups or glasses. Refrigerate for at least 1 hour before serving. Garnish with cocoa powder or chocolate shavings if desired.
Tips & Variations
- Use chilled bowls and beaters when whipping the cream to achieve better volume.
- For a stronger coffee flavor, increase the instant espresso powder to 1 1/2 tablespoons.
- Try topping with whipped cream and a sprinkle of cinnamon for a different twist.
- Substitute cream cheese with mascarpone for a richer taste and silkier texture.
Storage
Store the coffee mousse covered in the refrigerator for up to 3 days. Before serving, you can let it sit at room temperature for 10 minutes to soften slightly. Avoid freezing to maintain the mousse’s creamy texture.
How to Serve
Serve this delicious recipe with your favorite sides.
FAQs
Can I use regular brewed coffee instead of instant espresso?
Instant espresso powder is preferred because it dissolves easily and provides an intense coffee flavor without added liquid. Using brewed coffee may make the mousse too watery and affect the texture.
Is it possible to make this mousse dairy-free?
Yes, you can use coconut cream instead of heavy whipping cream and a dairy-free cream cheese alternative. Keep in mind this will alter the flavor slightly but still result in a creamy dessert.
PrintCoffee Mousse Recipe

This Coffee Mousse recipe offers a light and creamy dessert infused with rich coffee flavor, perfect for coffee lovers. Made with instant espresso, whipped cream, and cream cheese, it requires no baking and is ready after a short chill in the refrigerator. Garnished with cocoa powder or chocolate shavings, it’s an elegant and easy-to-make treat.
- Prep Time: 15 minutes
- Cook Time: 0 minutes
- Total Time: 1 hour 15 minutes
- Yield: 4 servings 1x
- Category: Dessert
- Method: No-Cook
- Cuisine: American
Ingredients
Coffee Mixture
- 1 tablespoon instant espresso powder or instant coffee
- 1 tablespoon hot water
Mousse
- 1 cup heavy whipping cream, chilled
- 1/2 cup powdered sugar
- 4 oz cream cheese, softened
- 1 teaspoon vanilla extract
Garnish (optional)
- Cocoa powder or chocolate shavings
Instructions
- Dissolve the Coffee: In a small bowl, dissolve the instant espresso powder (or instant coffee) in hot water. Set aside to cool slightly to avoid melting the whipped cream later.
- Whip the Cream: In a large mixing bowl, beat the chilled heavy whipping cream with powdered sugar until soft peaks form. This creates the light texture essential for mousse.
- Make the Mousse Base: In another bowl, beat the softened cream cheese until smooth. Add the cooled coffee mixture and vanilla extract, mixing thoroughly to combine all flavors.
- Fold in Whipped Cream: Gently fold the whipped cream into the coffee and cream cheese mixture. Use a spatula to carefully combine without deflating the whipped cream, maintaining the mousse’s airy texture.
- Chill and Serve: Spoon the mousse into serving cups or glasses. Refrigerate for at least 1 hour to allow flavors to meld and mousse to set. Before serving, optionally garnish with cocoa powder or chocolate shavings for an elegant finish.
Notes
- Use instant espresso powder for a stronger coffee flavor; substitute with instant coffee if unavailable.
- Make sure the cream cheese is softened to avoid lumps in the mousse.
- Do not overbeat the cream; stop when soft peaks form.
- Folding gently is crucial to keep the mousse light and airy.
- This mousse is best served chilled.
- For a lower-fat version, substitute heavy cream with whipping cream or use light cream cheese, though texture may vary slightly.
Keywords: coffee mousse, no bake dessert, coffee dessert, creamy mousse, easy mousse recipe