Salted Honey Pie Recipe
Introduction
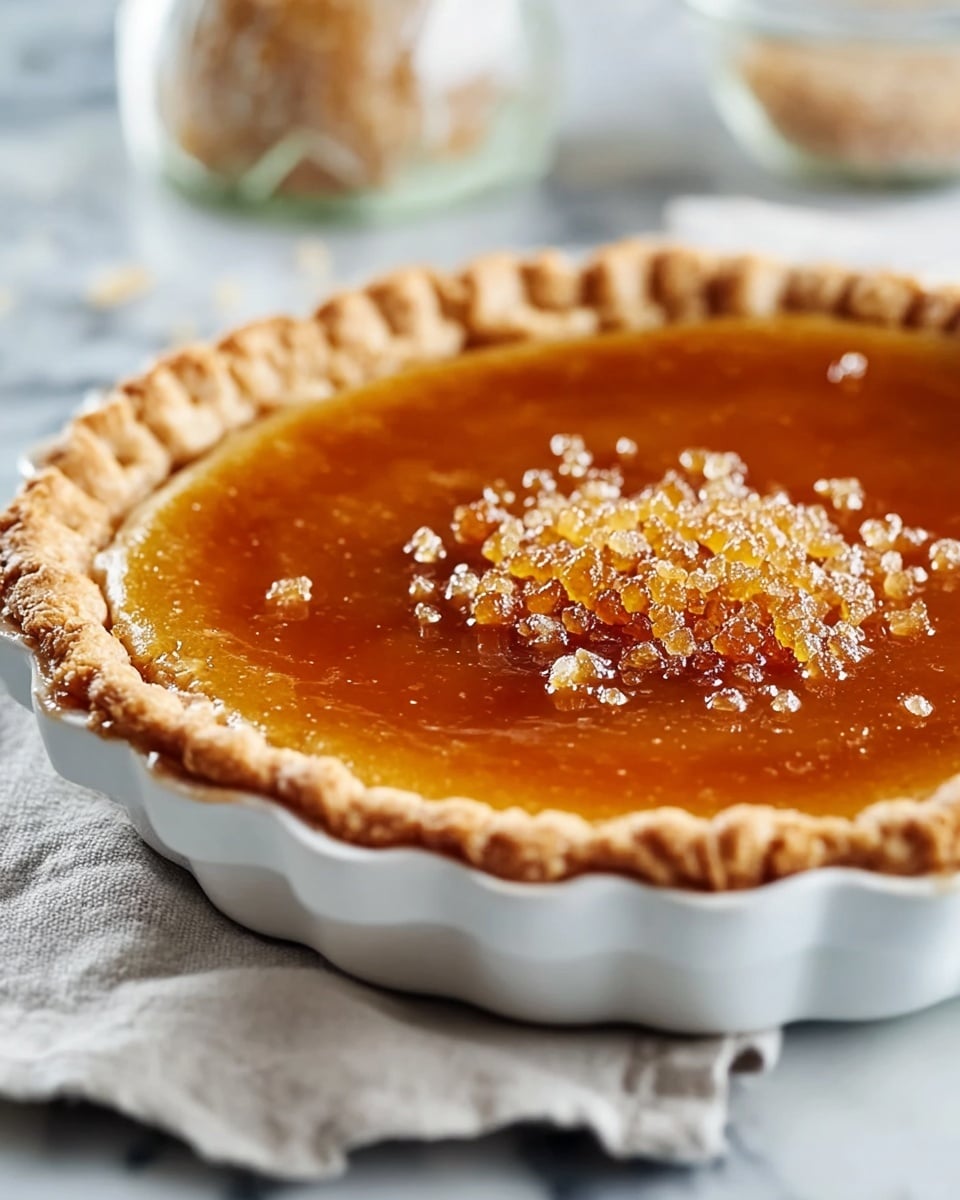
Salted Honey Pie is a luscious dessert combining a creamy, honey-infused custard with a flaky pie crust. The hint of flaky sea salt on top perfectly balances the sweetness, creating a sophisticated yet comforting treat.
Ingredients
- Pie crust (refrigerated or homemade)
- 4 large egg yolks, lightly beaten
- 2 1/2 cups (600 ml) heavy whipping cream
- 2/3 cup (150 g) packed light brown sugar
- 1/3 cup (45 g) cornstarch, sifted
- 1/2 tsp salt
- 1/2 cup (120 ml) honey
- 2 tsp vanilla extract
- Flaky sea salt, for sprinkling
Instructions
- Step 1: Prepare the pie crust in a deep dish 8-inch or 9-inch pie pan. There is no need to pre-bake it; simply chill it in the refrigerator while preparing the filling. Chilling the crust helps prevent shrinking and ensures even baking.
- Step 2: In a medium saucepan, combine the heavy cream, brown sugar, cornstarch, and salt. Heat over medium heat, stirring constantly until the mixture reaches a rolling boil and begins to thicken slightly.
- Step 3: Remove the cream mixture from the heat. Slowly ladle some of the hot cream into the beaten egg yolks while whisking constantly to temper the eggs and prevent curdling.
- Step 4: Gradually add the tempered egg yolk mixture back into the saucepan with the remaining cream. Stir well to combine, then add the honey and vanilla extract, mixing thoroughly.
- Step 5: Pour the custard filling into the chilled pie crust, spreading it evenly to avoid air pockets. The filling should be warm but not hot.
- Step 6: Bake the pie at 375°F (190°C) for 40-45 minutes. The filling will bubble and the top will brown slightly. Do not overbake; the pie may look slightly jiggly when done.
- Step 7: Allow the pie to cool to room temperature, then refrigerate until completely chilled and firm, which helps the custard set fully.
- Step 8: Before serving, sprinkle flaky sea salt evenly over the top to complement the honey’s sweetness with a delicate salty crunch.
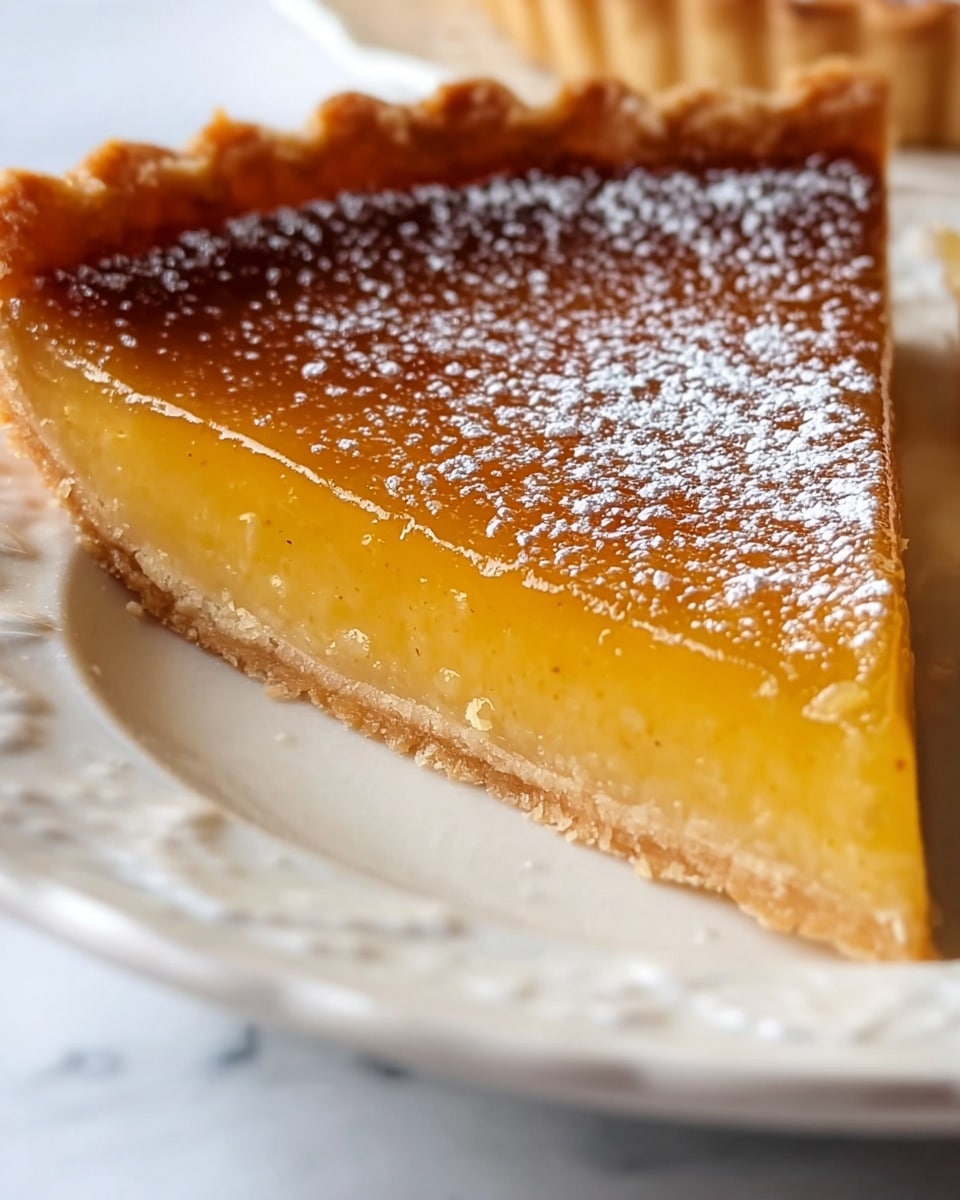
- Step 9: Slice into 8-10 pieces and serve chilled. Enjoy the smooth, creamy texture balanced by the flaky crust and salty finish.
Tips & Variations
- Use a homemade pie crust with cold butter for extra flakiness and flavor.
- Ensure to temper the eggs slowly to avoid lumps or curdling in the custard.
- Try drizzling a little extra honey on each slice for more sweetness if desired.
- Replace light brown sugar with dark brown sugar for a richer caramel flavor.
Storage
Store the pie covered in the refrigerator for up to 3 days. For best texture, avoid freezing as the custard may separate. Reheat slices gently in a warm oven if preferred, but the pie is best enjoyed chilled.
How to Serve
Serve this delicious recipe with your favorite sides.
FAQs
Do I need to prebake the pie crust?
No, this recipe is designed to bake the custard filling directly in the chilled pie crust without pre-baking, which helps achieve a perfectly flaky crust.
Can I use a different sweetener instead of honey?
Honey is essential for this pie’s distinct flavor and texture, but if needed, maple syrup can be a substitute. Note that the flavor will be different and possibly less rich.
PrintSalted Honey Pie Recipe

Salted Honey Pie is a luscious custard dessert with a flaky pie crust filled with a smooth mixture of honey-sweetened custard, lightly browned with a hint of sea salt. The recipe combines the rich flavors of brown sugar, honey, and vanilla to create a creamy, indulgent pie with a perfect balance of sweet and salty notes, ideal for any dessert occasion.
- Prep Time: 20 minutes
- Cook Time: 45 minutes
- Total Time: 1 hour 5 minutes plus chilling time
- Yield: 8–10 servings 1x
- Category: Dessert
- Method: Baking
- Cuisine: American
Ingredients
Pie Crust
- 1 refrigerated or homemade pie crust (8-inch deep dish or 9-inch pie pan)
Custard Filling
- 4 large egg yolks, lightly beaten
- 2 1/2 cups (600 ml) heavy whipping cream
- 2/3 cup (150 g) packed light brown sugar
- 1/3 cup (45 g) cornstarch, sifted
- 1/2 tsp salt
- 1/2 cup (120 ml) honey
- 2 tsp vanilla extract
- Flaky sea salt, for sprinkling on top
Instructions
- Prepare the Pie Crust: Place the pie crust in an 8-inch deep dish or 9-inch pie pan. Chill it in the refrigerator without pre-baking to ensure it holds the custard filling well and bakes evenly. Optionally, sprinkle sugar on top for added crunch and sweetness after baking.
- Heat the Cream Mixture: In a medium saucepan over medium heat, combine heavy cream, brown sugar, cornstarch, and salt. Stir constantly until the mixture comes to a rolling boil and thickens slightly, releasing a caramelized aroma.
- Temper the Eggs: Remove the cream mixture from heat. Slowly ladle small amounts of the hot cream into the lightly beaten egg yolks while whisking constantly to avoid scrambling. Gradually add more cream until the eggs are smoothly combined and warmed.
- Combine the Mixture: Pour the tempered egg yolk mixture back into the saucepan with the remaining cream mixture. Stir thoroughly until smooth. Add honey and vanilla extract, and mix well to blend flavors into the custard.
- Fill the Pie Crust: Pour the warm custard mixture evenly into the chilled pie crust, spreading to avoid air pockets. The filling should have a smooth, thick consistency with a pale golden color.
- Bake the Pie: Preheat the oven to 375°F (190°C). Bake the pie for 40-45 minutes until the custard bubbles and the top turns golden brown. The filling may appear slightly jiggly upon removal but will set while cooling.
- Cool and Set: Let the pie cool to room temperature on the counter, then refrigerate until fully chilled and firm. This step is essential for the custard to set properly and flavors to fully develop.
- Finish with Sea Salt: Just before serving, sprinkle flaky sea salt generously over the pie’s surface to enhance the sweet and creamy honey custard with a salty crunch.
- Serve and Enjoy: Slice the chilled pie into 8-10 portions. Each slice offers a creamy custard bursting with honey flavor and a satisfying balance from the flaky salted crust, perfect for any occasion.
Notes
- If using homemade pie crust, chill it thoroughly before filling to prevent shrinking and to maintain flakiness.
- Constant stirring during heating prevents lumps and ensures a smooth custard.
- Tempering the eggs is crucial to avoid scrambling and achieve a silky texture.
- Do not overbake to prevent the custard from becoming grainy; some jiggle is normal when removed from oven.
- Flaky sea salt crystals add texture and enhance the flavor contrast wonderfully.
- The pie is best served chilled after refrigeration to set the filling fully.
Keywords: Salted Honey Pie, custard pie, honey dessert, flaky pie crust, creamy dessert, homemade pie, sweet and salty pie